Create a New Dataset
This guide walks you through the steps to create a new dataset in the Data Catalog.
Note
There are fields on the dataset creation page that are automatically generated by the system, such as Dataset Identifier, Dataset Creator and Access Rights. Some of these fields cannot be changed.
Step 2: Add a New Dataset
On the Dataset List page, click the Add a new dataset button located right below the Search bar.
Step 3: Choose a Parent Project
Select a project from the list to link your dataset. If needed, you can unlink the dataset at any time.
Tip
Choosing a Parent Project links your dataset to the project it belongs to. This ensures your data stays organized, easy to find and correctly associated.
Step 4: Fill in Dataset Metadata
Complete all the required fields marked with *:
Dataset Title (
*)Dataset Description
Dataset Type (
*):Raw
Processed
Results
Resource Type
Instrument
Note
→ Resource Type: The type of experimental or analytical methodology that generates the data (e.g., DNA sequencing, RNA sequencing, Proteomics (DIA)).
→ Instrument: The equipment used to generate the data (e.g., MiSeq (Illumina), NextSeq (Illumina), GridION (Nanopore)).
Final Step: Complete your Dataset
Click Create dataset at the bottom of the page to complete the process.
.gif)
Dataset Creation
Tip
→ While only a few fields are required to create a dataset, we strongly recommend filling in additional fields, based on any relevant information you may have.
→ Providing more context makes your dataset easier to understand, discover, and reuse, both for you and others.
→ If you are unsure about some details, you can always include what you know and update the dataset info later if needed.
Access Rights and Visibility
Similar to projects, datasets have two access rights settings:
BRIGHT-visible:
Dataset metadata is visible (read-only) to all BRIGHT employees.
Restricted:
The dataset is completely hidden to all BRIGHT employees, except from users who have been explicitly granted permissions.
➣ By default, datasets as well as projects are set to BRIGHT-visible, but you can change the access rights when creating or editing a dataset.
Understanding how access rights affect visibility is important for collaboration:
Note
Users without assigned permissions (see Manage Dataset User Permissions) follow the dataset access rights:
→ For BRIGHT-visible dataset: Metadata is visible (read-only) to all BRIGHT employees
→ For Restricted datasets: Dataset is completely hidden
Add Projects to Dataset
When you created the dataset, you already selected a “Parent project”, which creates an initial relationship. You can also add additional projects from the Projects tab on the dataset home page. This helps you associate the dataset with other research contexts.
Note
To add a project to a dataset, two conditions must be met:
→ You must have the Can Add Datasets permission on the project you want to add the dataset to
→ You must have access to the dataset (either Bright-visible or through a dataset user permission, if it is restricted)
If either of these is missing, you will not be able to proceed.
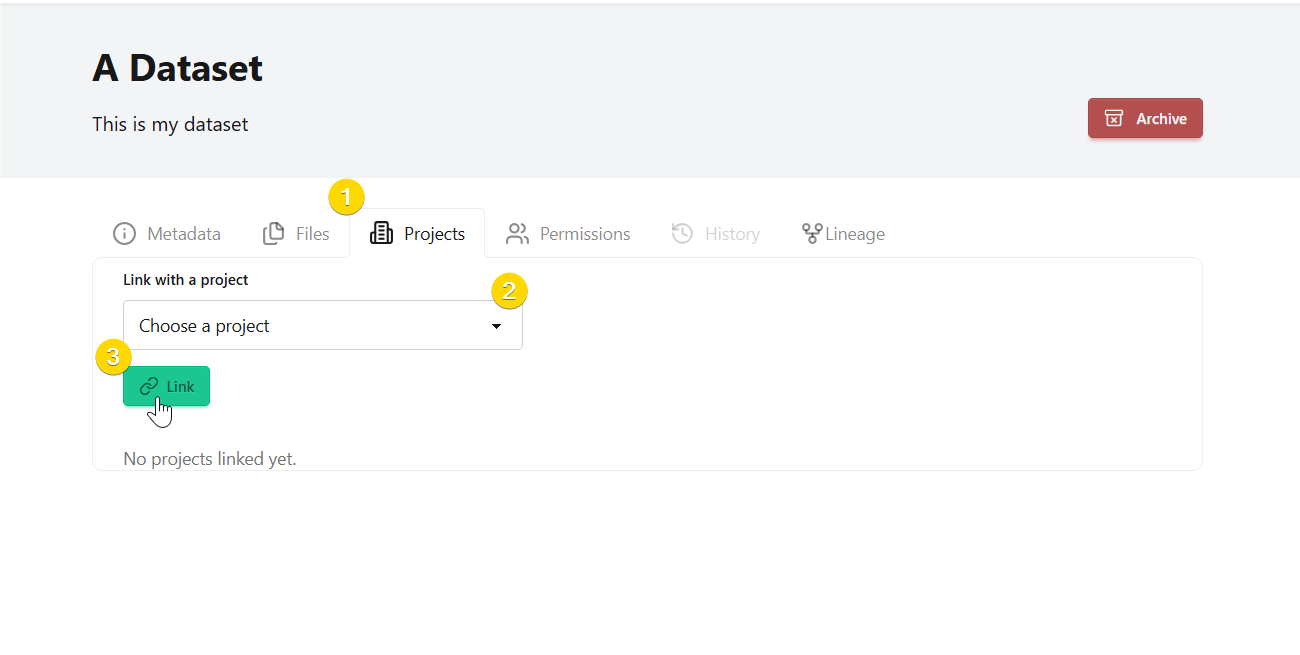
To add another project to a dataset:
Click the
Projectstab on the dataset home pageSelect the project you want to add from the list
Click
Linkto complete the process
To remove the relationship:
Click
Unlink, and the project will be removed
Add Projects to Dataset
Note
This relationship also appears under the Datasets tab on the project home page.
Dataset Lineage
Once you have created a dataset you can define its Lineage by linkinng it to one or more datasets.
➣ Lineage creates a relationship that shows how datasets are related across different stages (e.g., raw → processed → results).
➣ It ensures data provenance by identifying source datasets when creating new ones (e.g., pipelines), supporting reproducibility.
Important
To create (or remove) a Dataset Lineage between datasets you must have the permission Can Link To on both datasets, otherwise you will not be able to perform this action or see the destination dataset in the linking list.
To add a Lineage:
Click the
Lineagetab on the dataset home pageChoose the relationship type:
Add Ancestor, if the selected dataset creates the current datasetor
Add Descendant, if the selected dataset is a result of the current dataset
Select the dataset from the list
Add a description explaining the relationship (optional)
Click the
Add Ancestor(orAdd Descendant) button to complete the process
To remove a Lineage:
Click
Remove link from datasetSelect the link and click
Delete
.gif)
Dataset Lineage
Setup a Dataset in Seqera Workspace (WIP- work in progress)
In the Seqera section you can set up a Dataset as input for running Nextflow pipelines in Seqera Workspace. Once the analysis is complete, you can copy the results back to Data Catalog as a new dataset under the project of your choice. Follow the steps below to get started:
Open the dataset you want to use as input for your pipeline
Click the
Seqeratab on the dataset home pageFrom the dropdown list, select the project under which you want the result dataset to be created and to which the pipeline costs will be billed.
Only projects where you have the Can Set Up Workspace permission will appear in the list.
Click
Create a new setupGo to Seqera, select your pipeline, and run your analysis as usual
Once the analysis is complete, return to Data Catalog and refresh the page. A NEW button will appear in the Seqera tab of the same dataset.
Click
Copy Backbutton. A new dataset containing the analysis results will be created and will be visible alongside other datasets under the “Datasets” tab on the project home page you selected in step 2.
Note
Please note that this functionality is still under development and may not work as expected at the moment.
API Availability
The actions described in this page can also be performed programmatically using our FastAPI. For more details, see the following endpoints in our API Reference: