Submit samples for analysis to Analytics
Benchling has replaced one of its modules (“Requests”) with another new module (“Workflow”). To discover how to submit samples for analysis to the Analytics team using Workflows, follow this guide.
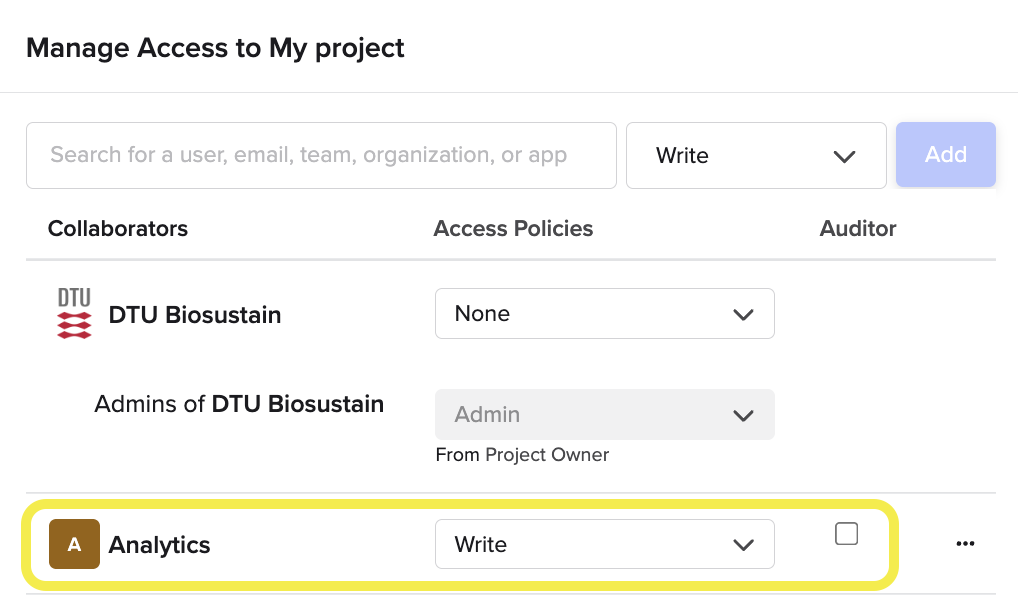
Grant access to Analytics to your Project
Add Analytics Benchling Team to the list of collaborators in your Project to enable the analysts to access the samples you are going to register.
Navigate to your Benchling Project settings ⚙️
Add the Analytics Benchling team to the list of collaborators (with “WRITE” access)
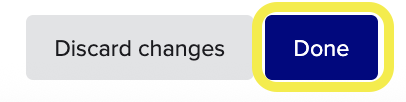
Save edits to the settings by clicking “Done”.
→ How to add a user or a Team as collaborator in your project
Register samples directly in your Notebook Entry
In order to register samples to submit to Analytics, you can follow a Sub-template created by LIMS support for this purpose.
Follow this video to learn how to do it:
Summary of the steps:
Navigate to your experiment Notebook Entry
Insert the sub-template “Analytical Sample Submission” in the Entry
→ You can choose between different samples storage options: Plate, Box, single Vials.
Fill-in the registration and inventory tables that appeared in your Notebook Entry with the required metadata.
Note
When moving samples in a Box or a Plate, please do so row-wise (A1, A2, A3…) as showed in the video.
Copy (Command+C / CTRL+C) the newly-registered samples entities from the last table
Create a Workflow
In order to submit your newly-registered samples for analysis to the Analytics team, you need to create a Workflow and attach the samples within it.
Note
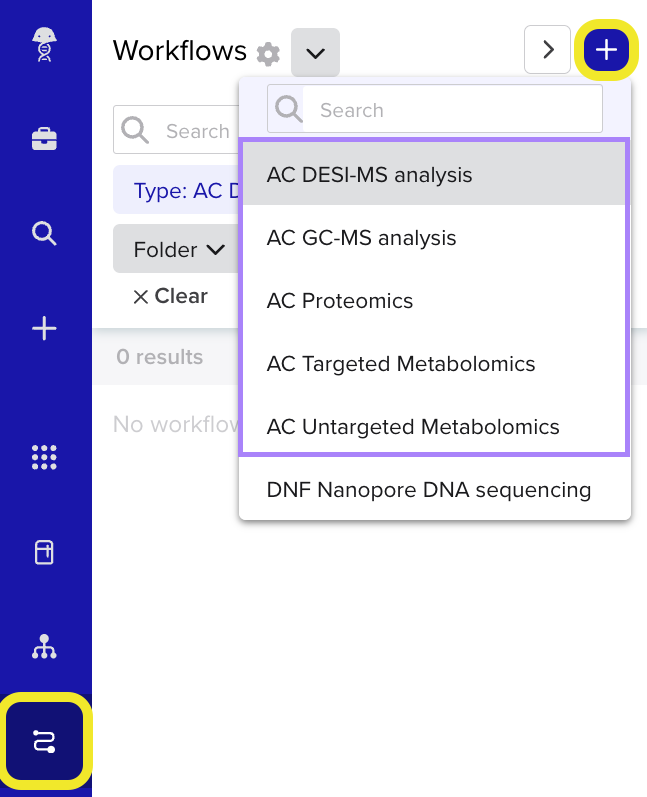
The Workflows that you can submit to the Analytics team for in-house analysis are labelled with “AC” (that stands for “Analytics”). Check the full list of available “AC” Workflows here.
Follow this video to learn how to do it:
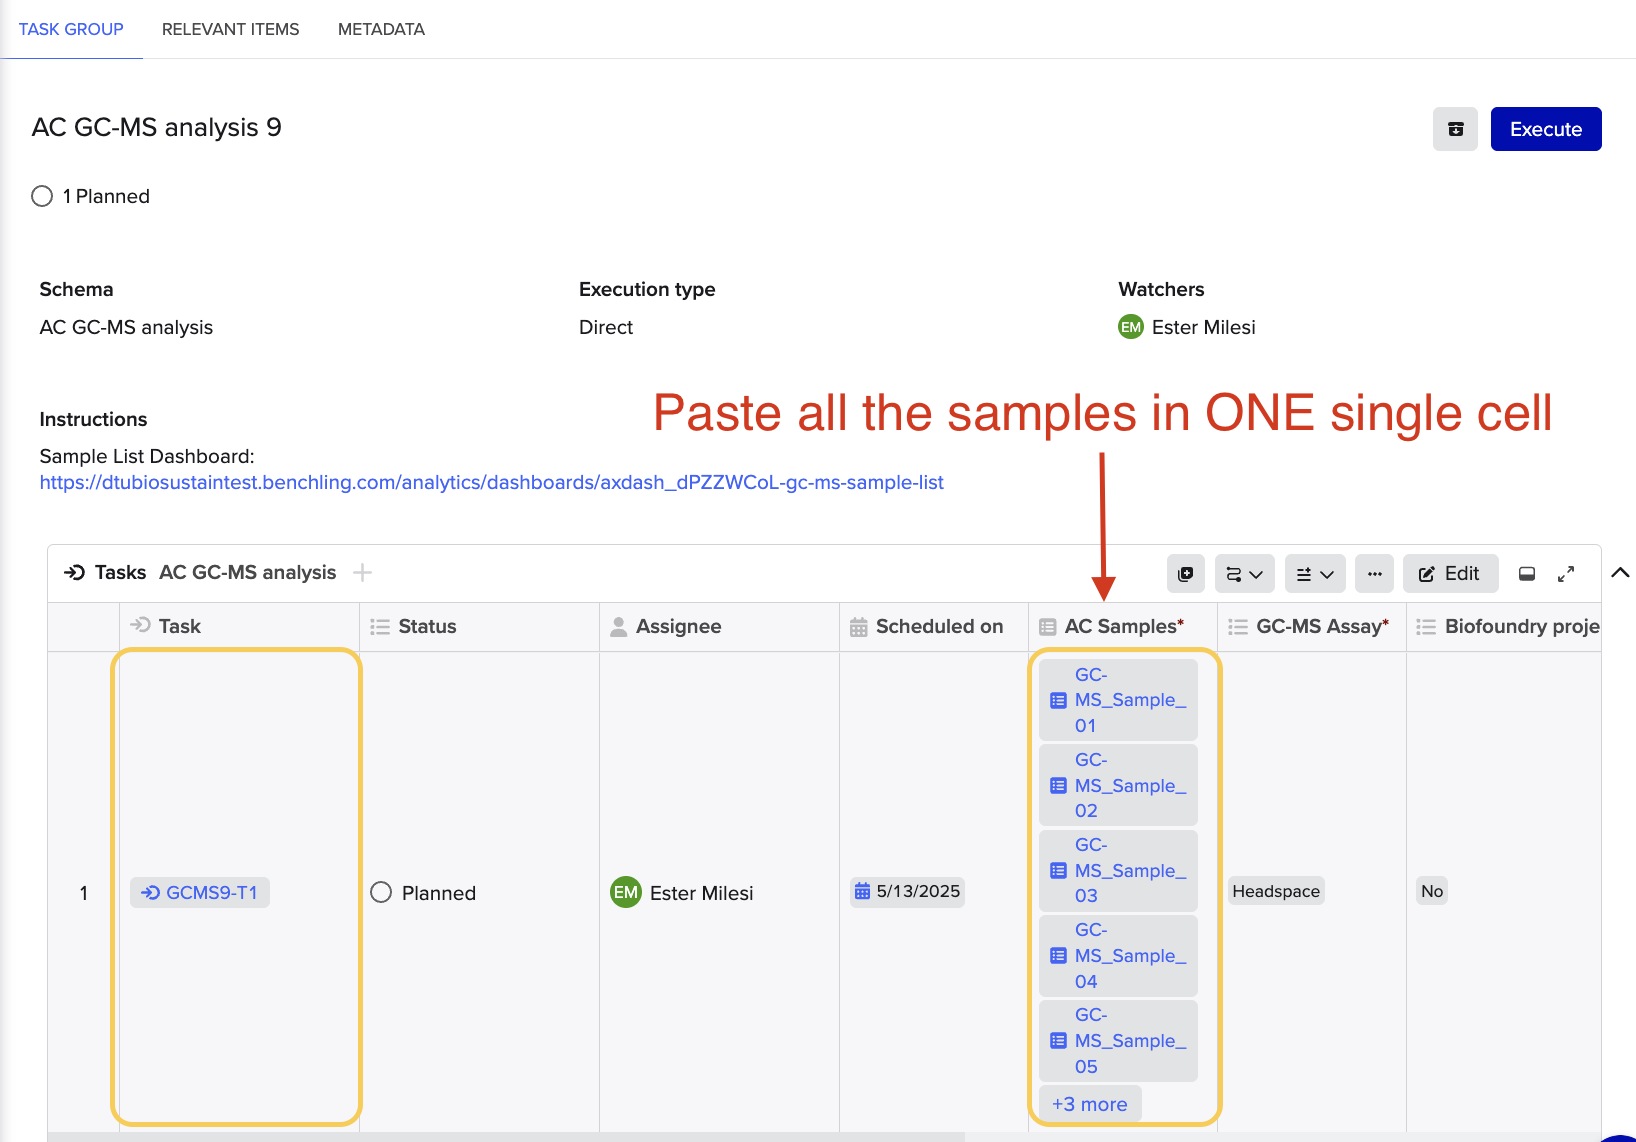
VERY IMPORTANT!!
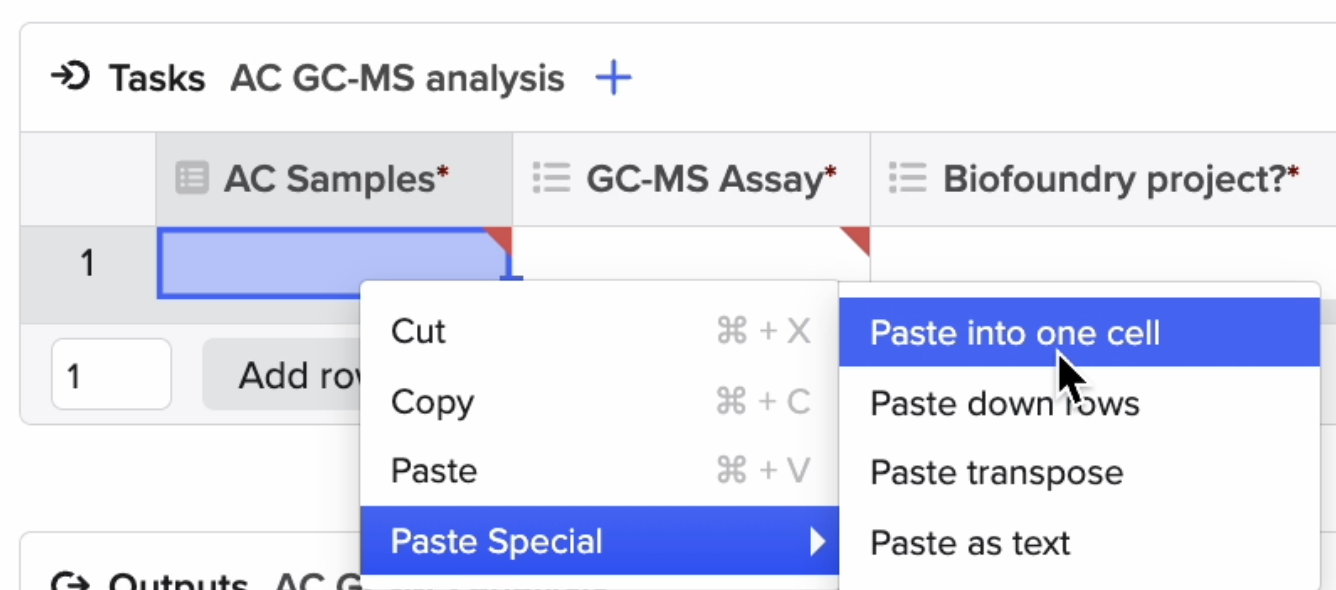
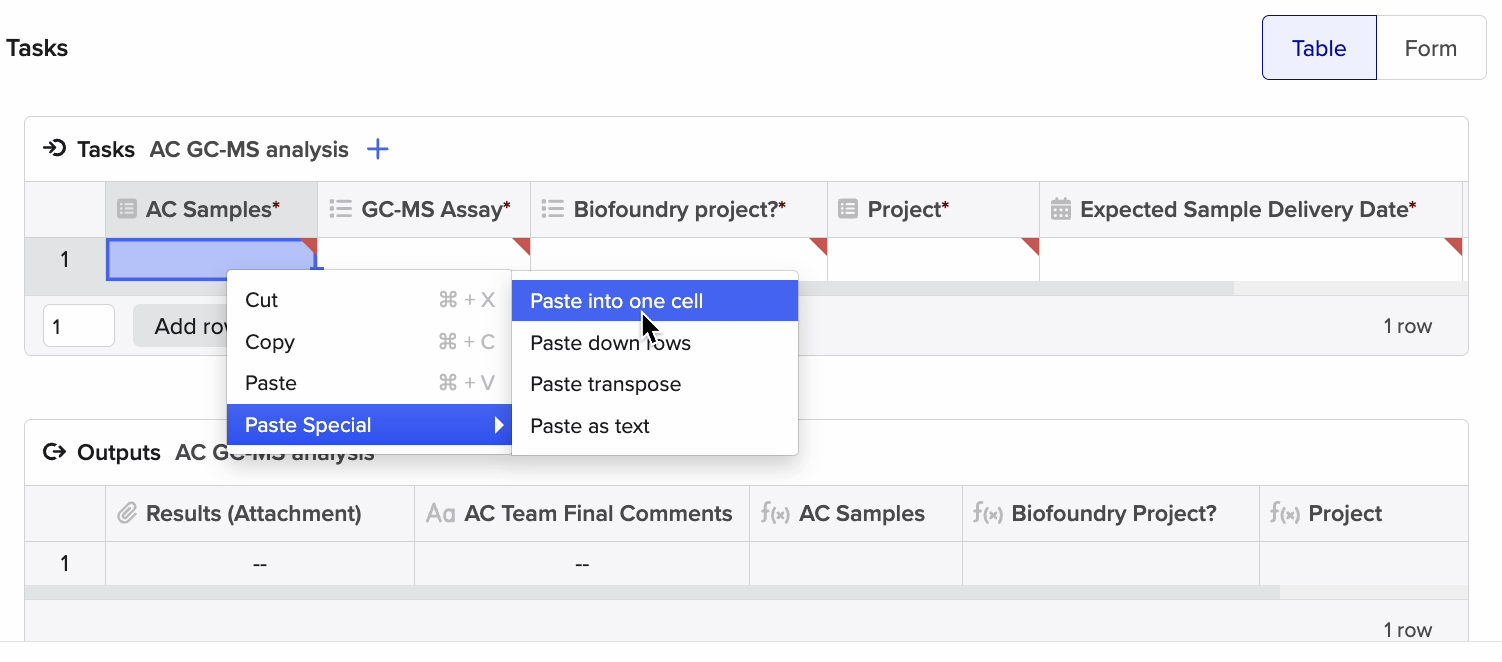
When creating a workflow, paste all the samples in one single cell in the “AC Samples” column (as showed in the screenshot downbelow, and in the video). If you have sample-level metadata, please add them in the previous step (when you are registering the samples in your Notebook entry).
You can achieve it by using the “Paste special” button:
Summary of the steps:
Create a Workflow of the relevant type, based on the analysis your are interested in.
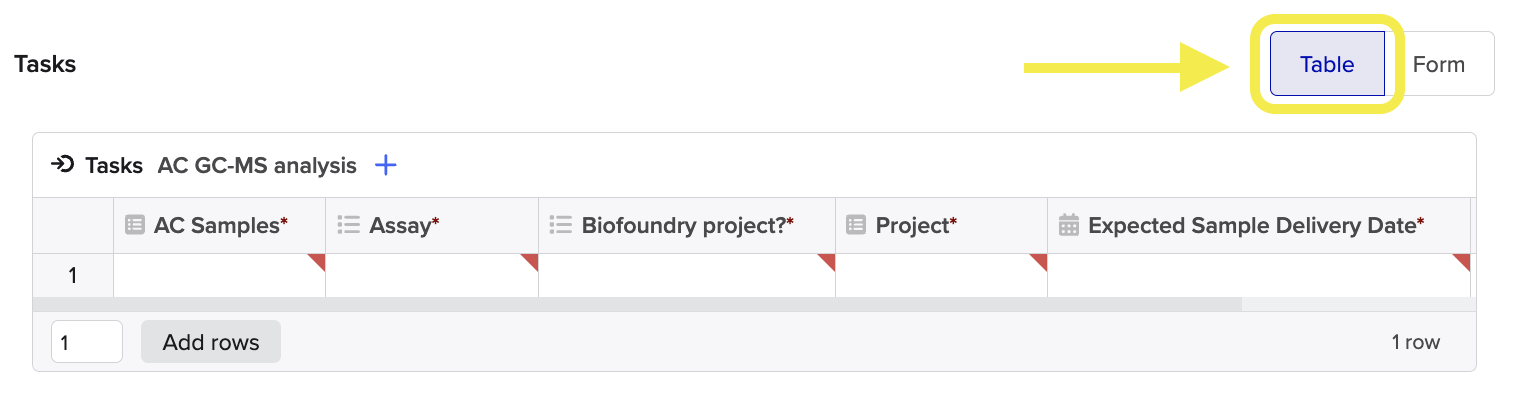
Select “Table” format for your Task table
Paste the samples entities in a single AC Samples column cell
Fill-in the remaining metadata fields.
→ Remember to specify the correct “Project number” and to save the Workflow in the relevant Project folder (the video’s Project number and Project folder are used as examples).
Click on “Create”. The analyst will receive an email and therefore will be informed about your submission.
Important
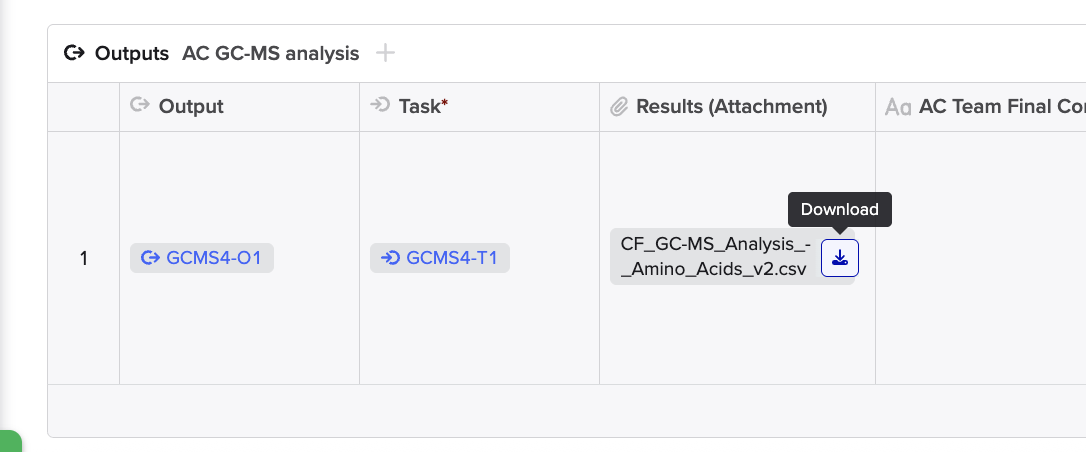
You will receive an email when your samples have been analyzed and the results have been added to the Output table of the Workflow. To access the results, download the attached file.
List of available Workflows
This is the available list of Workflows (one for each analysis type performed by the Analytics team):
If you have any question, don’t hesitate to contact us at lims_support@bright.dtu.dk.