Electronic Lab Notebook (ELN)
Documenting experiments is an indispensable part of scientific research.
Much like the traditional paper notebook, you can open a blank electronic lab notebook (ELN) entry and start writing your experimental notes. However, the Benchling ELN (also called “Notebook”) is built to facilitate and elevate note taking.
🎯 In this guide you will learn how to make the most out of the ELN capabilities to make experiment documentation easier and more powerful:
Version control your ELN entry
Link the experimental entities in your ELN entry
Leverage templates and subtemplates for better note taking
Use ELN tools helpful for planning and reporting experiments
Organize and navigate your notes with ease
❓ What is an entry?
A Benchling entry is like a digital notebook page. Entries share a lot of similarities with entities, but provide a word processor tab to write notes. As you develop your project, you will create entries to document the experimental work and entities to track biological objects involved in the experiments.
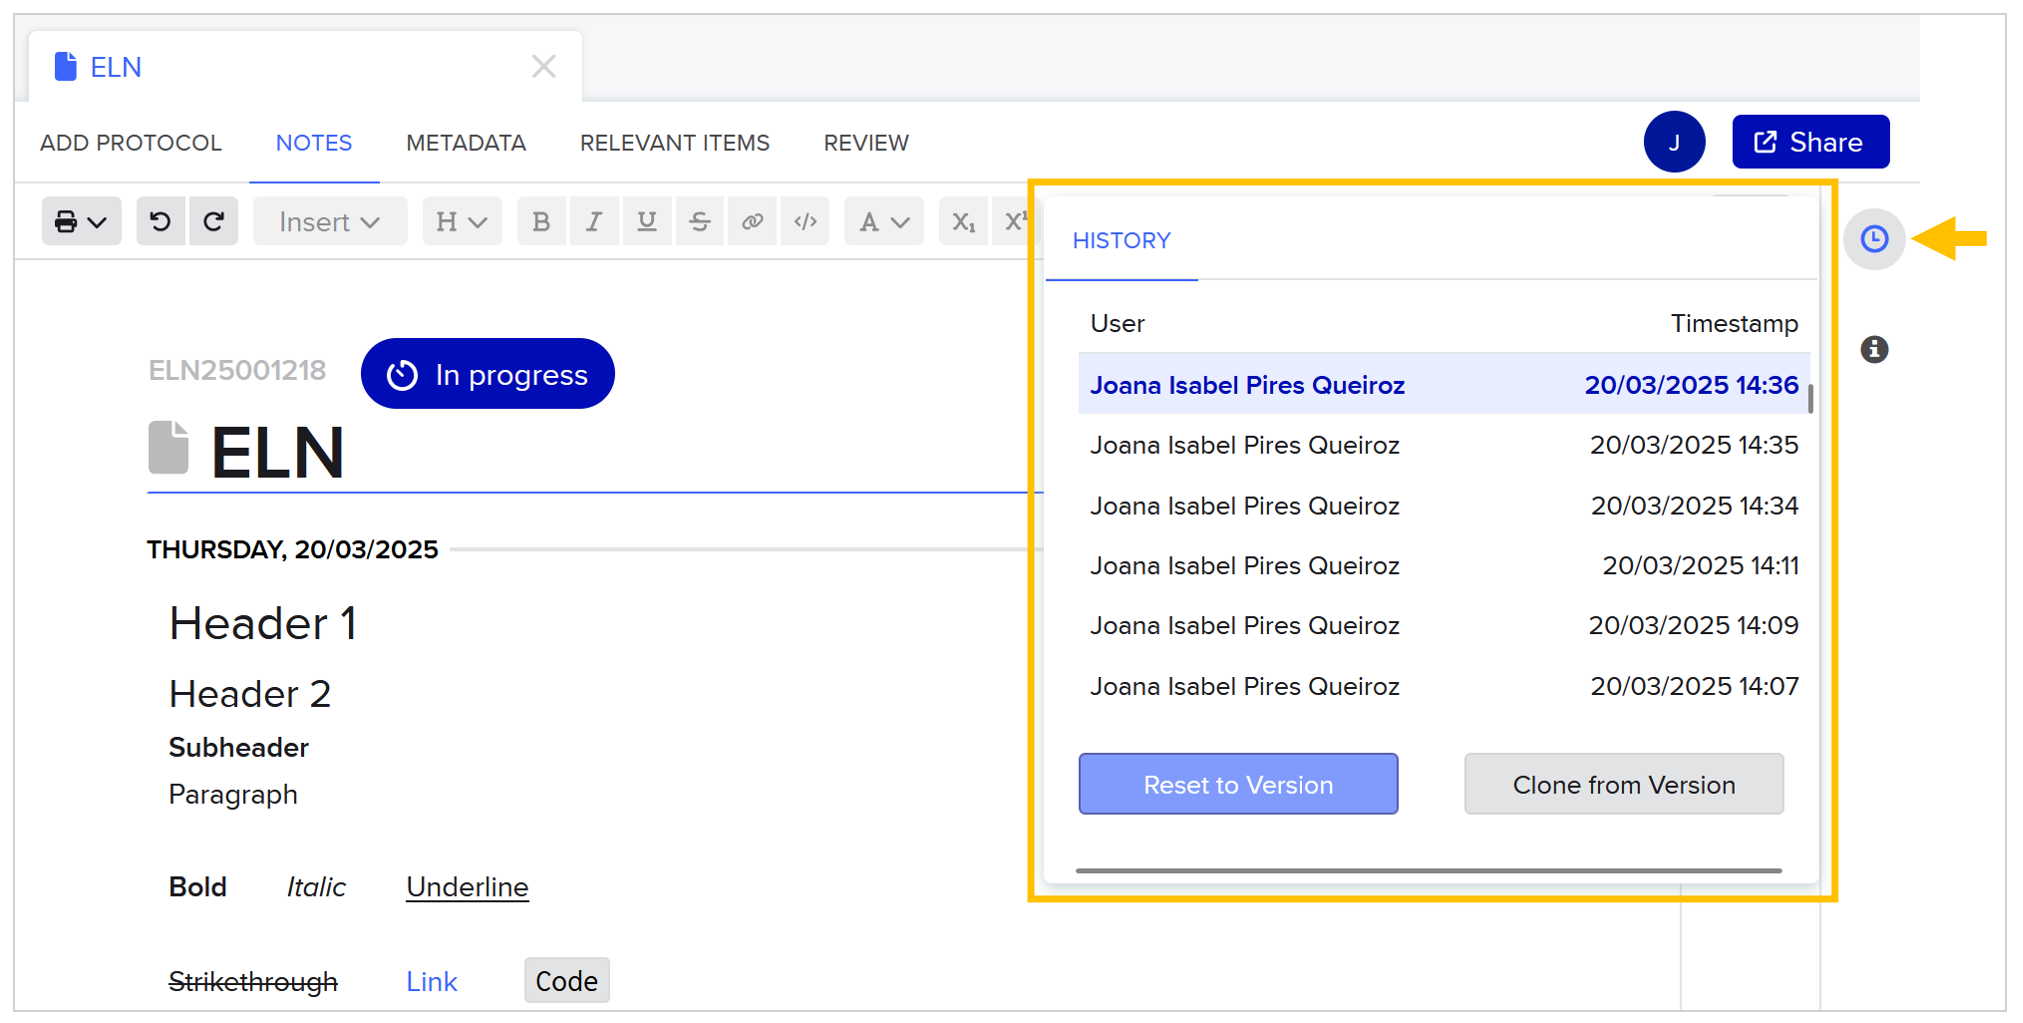
✅ Learn to version control your ELN
As you edit your ELN entry, Benchling is automatically saving each version of your entry. This feature may be very useful, as it enables you to access the history of versions of your entry and, if needed, you can:
Restore the entry to a previous version, e.g. because you accidentally deleted/added content.
Clone a version to a new entry, e.g. because you want to try and compare different methodologies during part of an experiment.
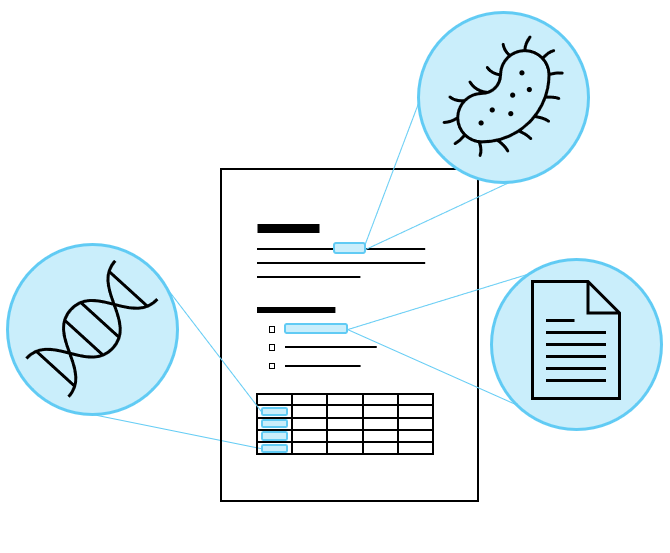
✅ Link the experimental entities in your ELN
Use Benchling internal links within the ELN to directly connect important components of your experiment - strains, plasmids, primers, protocols, etc. - with the corresponding experiment documentation. You can also link to a user or to a location (room, box, shelf, etc.).
Type @ to search for and select the Benchling item you want to link, either within text or tables. This shortcut enables you to create a more systematic and precise report with ease.
Additionally, these internal links establish clear relationships between project items, which are conveniently displayed in the “Relevant Items” section of each entity’s metadata. This section is useful, for example, to find out exactly in what experiments a certain entity was involved in.
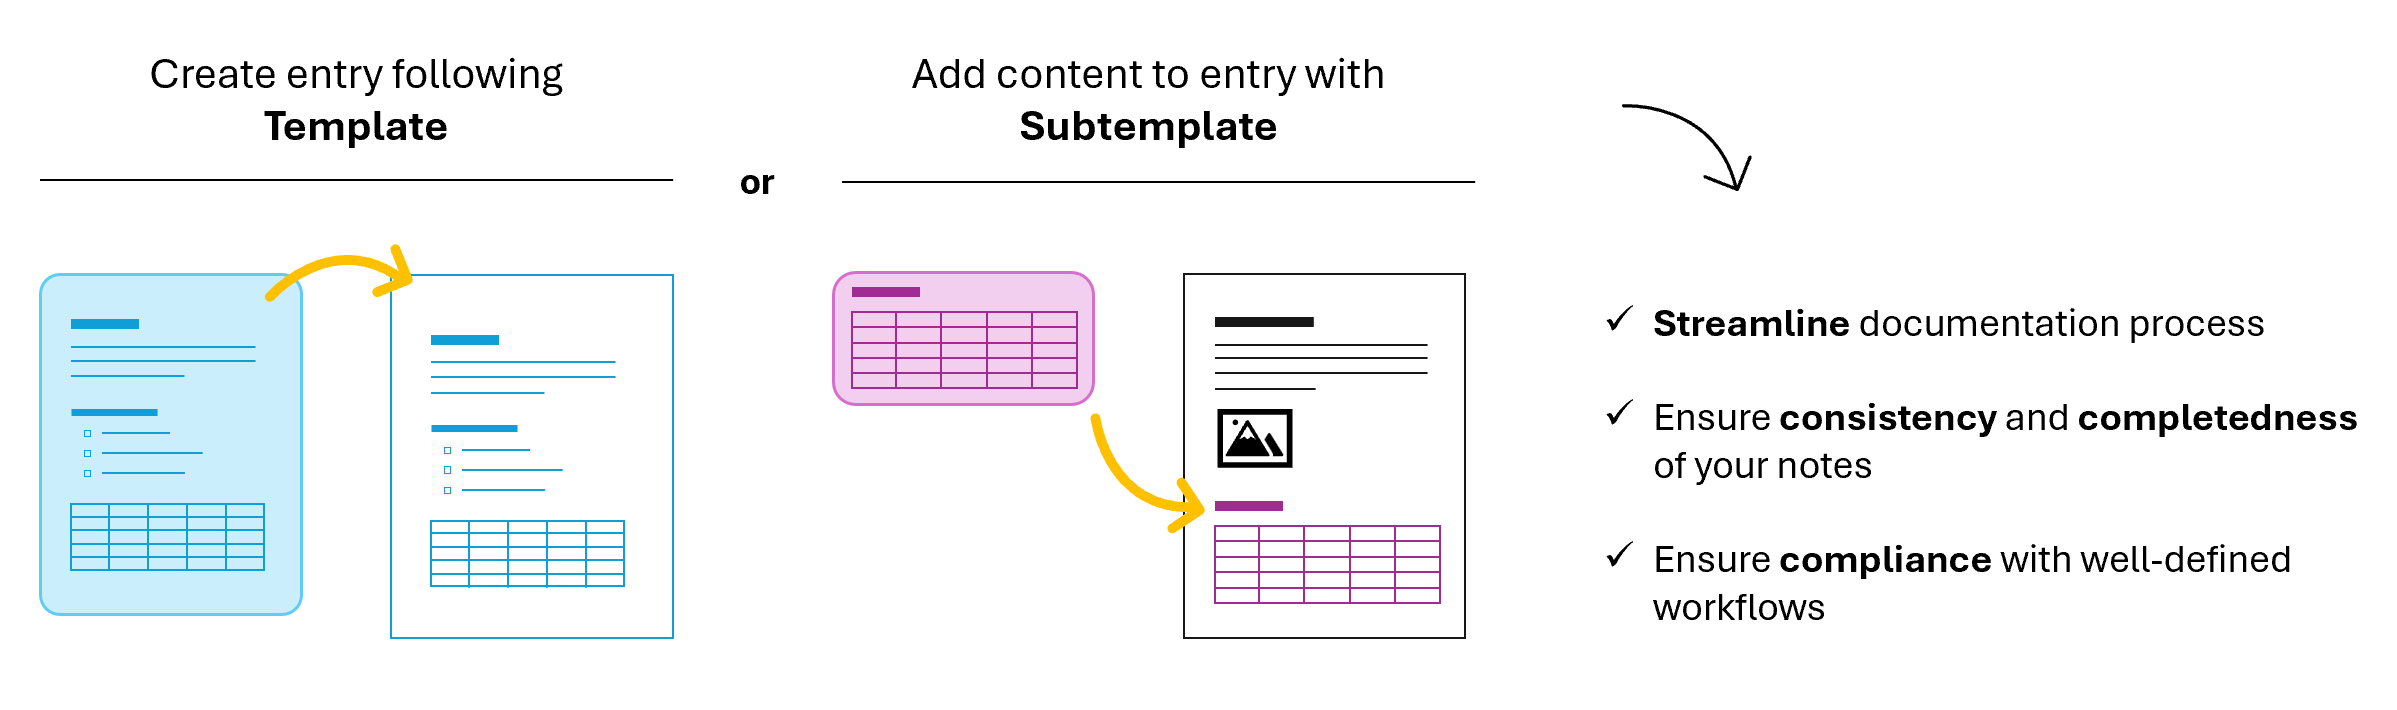
✅ Leverage templates and subtemplates for better note taking
Research in the lab often involves recurring workflows and, naturally, repetitive note taking. It is for such cases that templates and subtemplates are particularly useful.
Templates and subtemplates are standardized layouts that can be used as starting points for your ELN entries. These enable you to cut down on manually writing and structuring notes, which can both be laborious and lead to inconsistent documentation across collaborative projects.
➡️ Use templates and subtemplates
Templates are useful for documenting stable and repeatable processes. The template defines the general content of your entry, which you can then edit to add the details specific to the experiment. Example: template for well-defined cloning method.
Alternatively, templates can be simply used for establishing a structure to different types of documents. Example: templates to set a specific structure for protocols and reports.
Subtemplates are flexible snippets of content that can be inserted anywhere in an entry, therefore are useful for processes that reocur across experiments. Example: subtemplate with tables and checklists to set up PCR reaction.
🎬 See video tutorial to learn how to create an entry from a template.
Summary of steps:
Create > Entry > Entry from templateSearch for and select template
Name entry and indicate entry’s initial date
Create entry
Edit and write in entry to document your experiment
🎬 See video tutorial to learn how to insert a subtemplate into an entry.
Summary of steps:
Open entry
Insert > SubtemplateSearch for and select subtemplate
➡️ Develop a team template collection
Templates and subtemplates are organized into collections. Each team should develop their own collection of templates. This is helpful not only for sharing templates that are useful across the team, but also for establishing a common-ground - structuring the documentation process as a team to facilitate collaboration.
Create templates and subtemplates within your team collection. If your team does not have a template collection, create one.
🎬 See video tutorial to learn how to create a template collection.
Note:
Permissions for templates are set at the collection level. See below the different tiers of permissions that can be granted to users or teams for template collections:
Permissions |
None |
Read |
Write |
Admin |
|---|---|---|---|---|
View Templates in Template Collection |
❌ |
✔️ |
✔️ |
✔️ |
Create Notebook Entries from Templates |
❌ |
✔️ |
✔️ |
✔️ |
Create New Templates in Template Collections |
❌ |
❌ |
✔️ |
✔️ |
Delete a Template |
❌ |
❌ |
✔️ |
✔️ |
Edit Template Collection Properties |
❌ |
❌ |
❌ |
✔️ |
Change user permissions for Template Collections |
❌ |
❌ |
❌ |
✔️ |
🎬 See video tutorial to learn how to create a template or subtemplate.
Templates and subtemplates are created within template collections.
Summary of steps:
Navigate to the template collection
Create > Entry templateWrite and design template like you would for a normal notebook entry
Note: To create a subtemplate instead of a template, follow the video tutorial but in the ‘Create’ dropdown select Subtemplate option (Create > Subtemplate).
✅ Leverage ELN tools for planning and reporting experiments
More than a simple word processor, the ELN provides extra tools that support the planning and reporting of experiments. These can be inserted into your ELN through the Insert dropdown in the toolbar, or by typing the “/” shortcut.
➡️ Insert and view files within your ELN
You can upload files up to 2GB directly into an entry by either drag-and-drop or copy-paste of a file, or by clicking Insert > Attachment > select file. If larger files are needed, store them externally and link the file.
Images are displayed directly in the entry, while attachements such as Word, Excel, Powerpoint, PDF and text files can be viewed in a tab that opens within the entry upon clicking on the file.
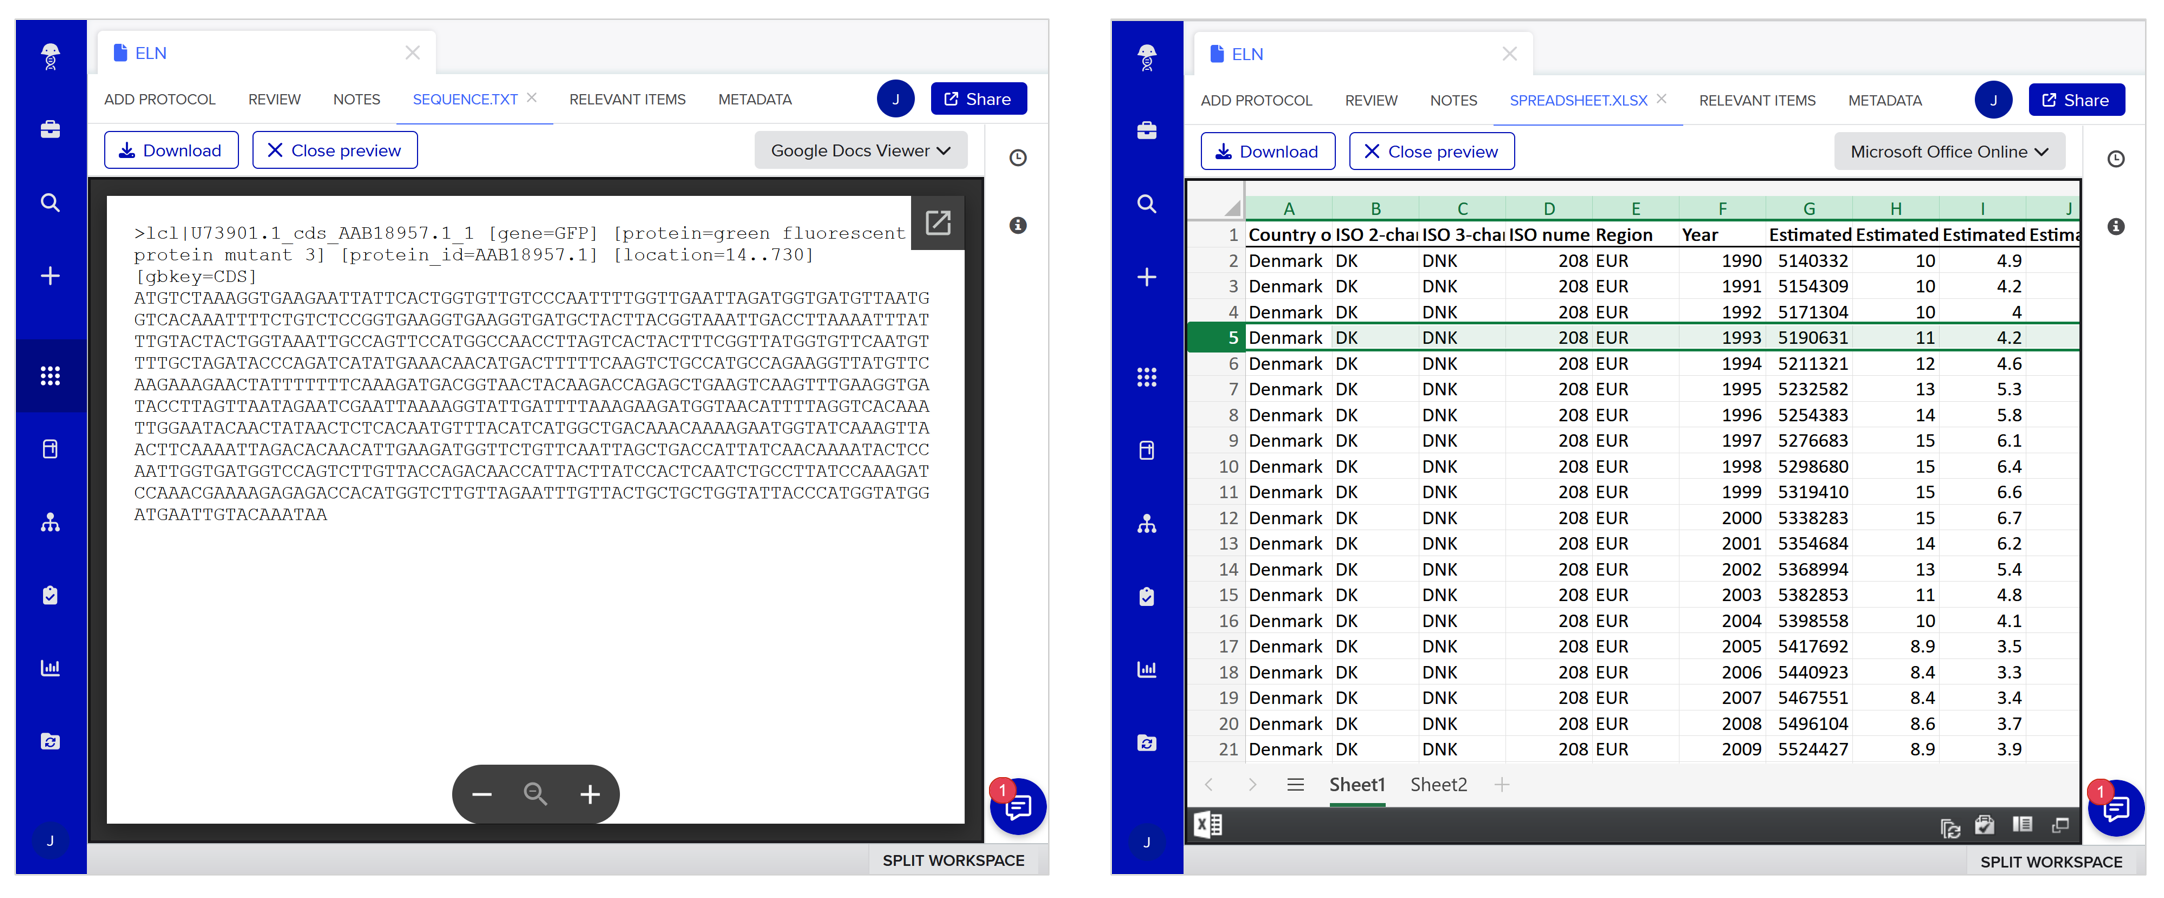
Tip
Use the Split Workspace functionality (button on the bottom right corner of the window) to split your workspace and simultaneously work on your notes and have the file preview side by side!
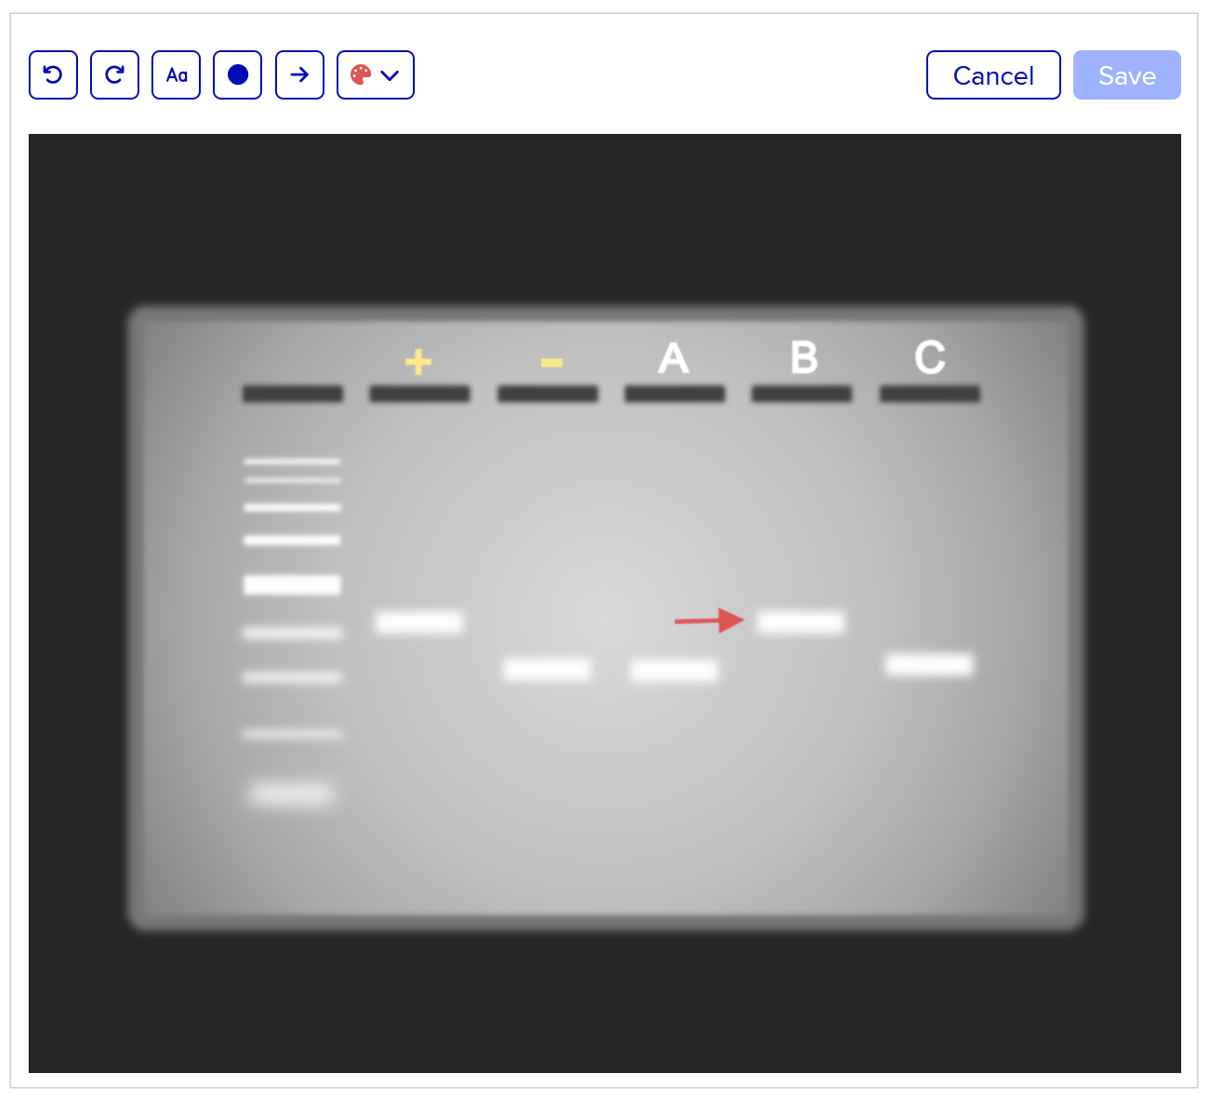
➡️ Annotate images
Benchling now allows you to annotate images within entries. When you click “Annotate image” you are given the option of adding text, arrows or circles, then dragging, re-sizing and coloring these elements.
➡️ Use tables to perform spreadsheet calculations
Tables in the ELN allow you to perform calculations and format table similarly to other spreadsheet applications.
Writing your formulas using ‘=’ to begin, and anchoring cells in a formula with ‘$’.
Using predefined functions (SUM, AVERAGE, MIN, MAX, COUNT, etc.).
Converting to scientific notation and setting decimal precision.
Dragging cell to auto-fill numerical series.
Merging cells, and deleting/inserting rows or columns.
Formatting cell and text colours.
For more information, check out Benchling guide Use tables in Notebook entries.
➡️ Use structured tables to create and register entities
You can create your Benchling entities and inventory items directly in your ELN using structured tables. The available types of structured tables are the following:
Registration table: create and register entities.
Inventory table: move entities in boxes or plates.
Box Creation table: create boxes.
Plate Creation table: create plates.
Lookup table: look up values from registry entities and inventory items.
Result table: register results linked to entities.
Mixture prep table: create Medium Batches from your Medium Recipes.
Learn how to:
✅ Organize and navigate your notes with ease
The ELN has many word processing functionalities to format and structure text, that allow you to write well organized and easy to read notes. Besides, it automatically generates a table of contents that facilitates navigation in lengthy entries.
➡️ Format and structure text
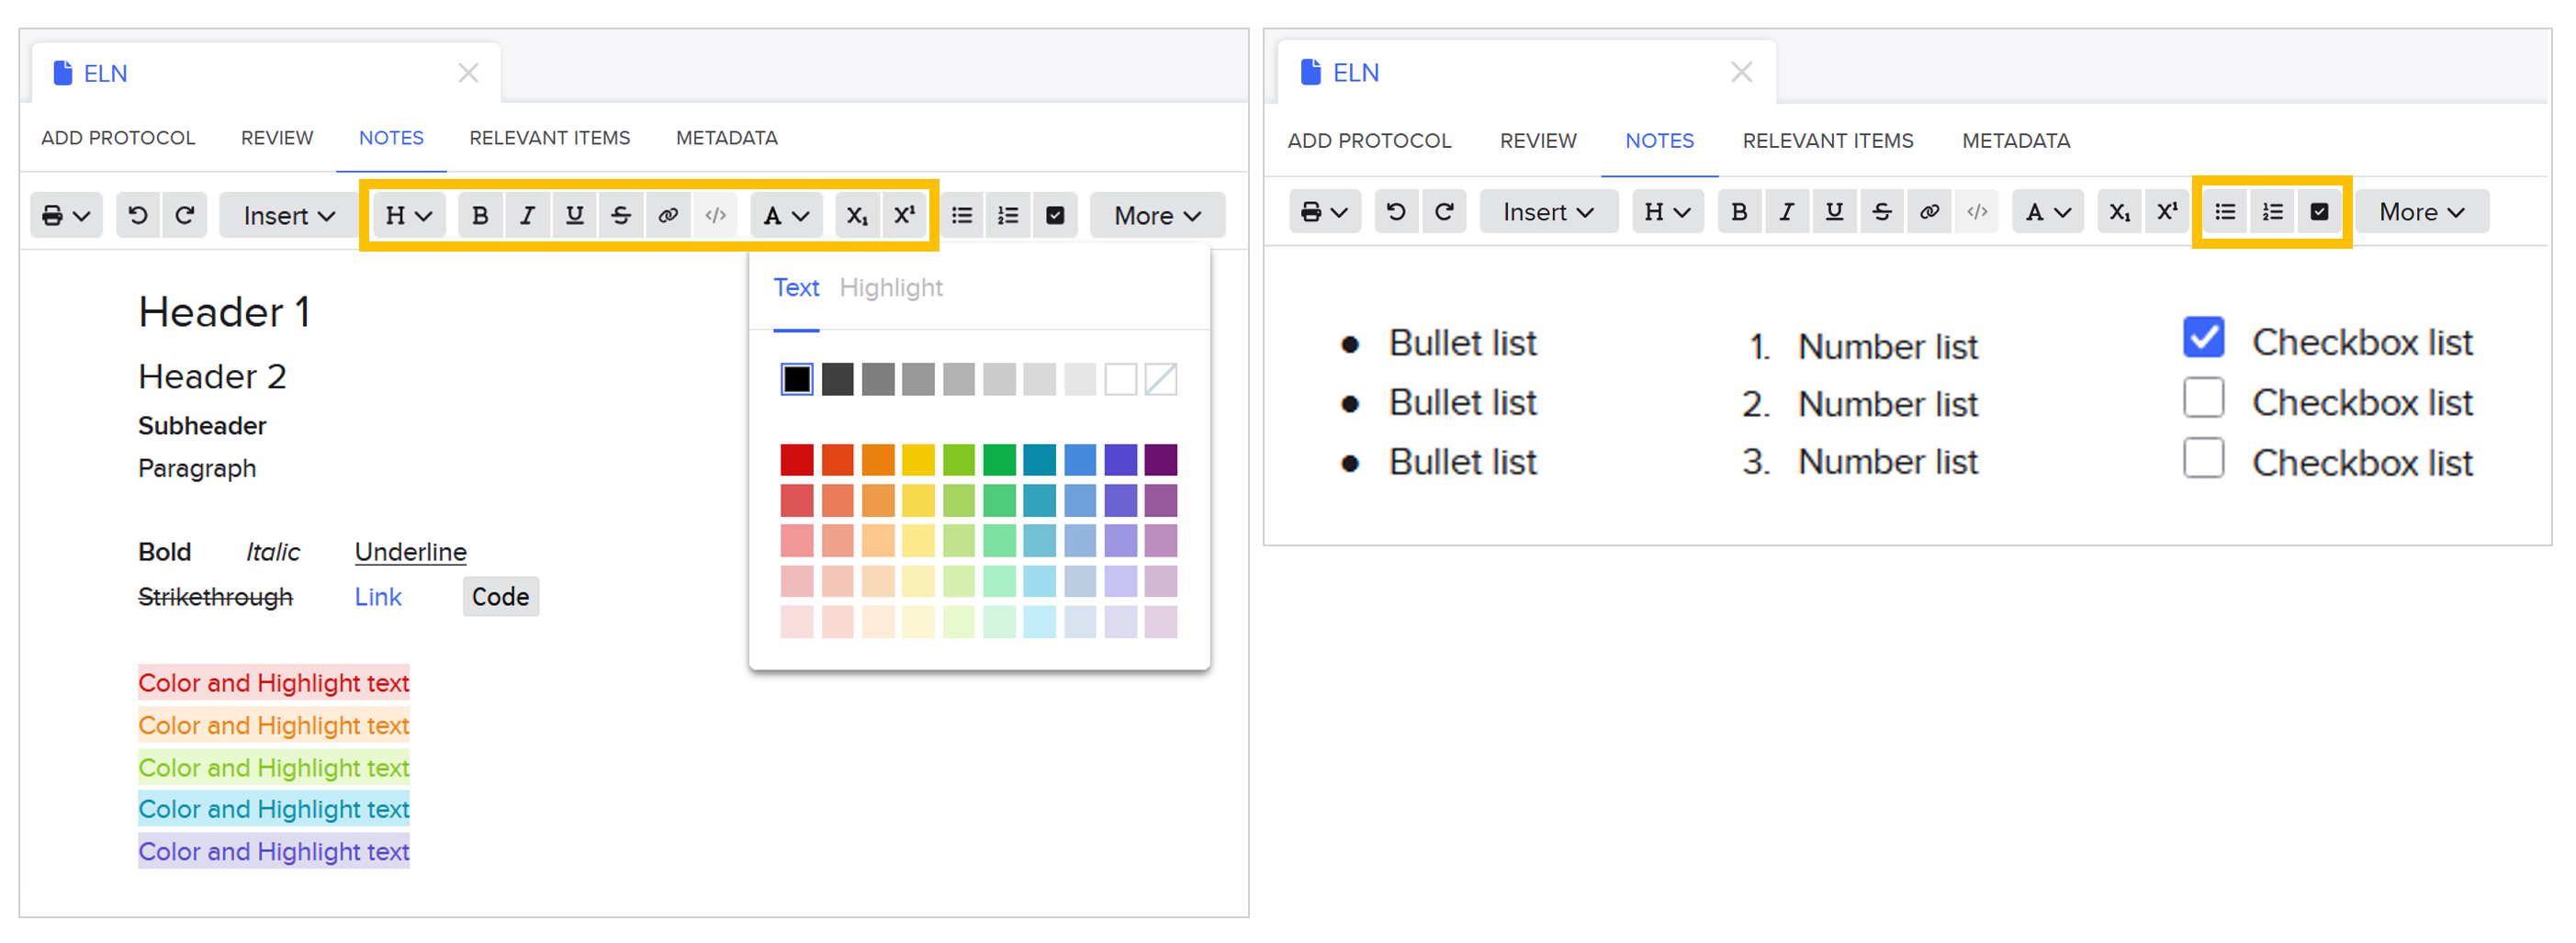
Similarly to other word processors, in the Benchling ELN you can: section notes by day, toggle headers, format text style and change text or highlight color. You can also create three types of lists: bulleted, numbered or with toggable checkboxes.
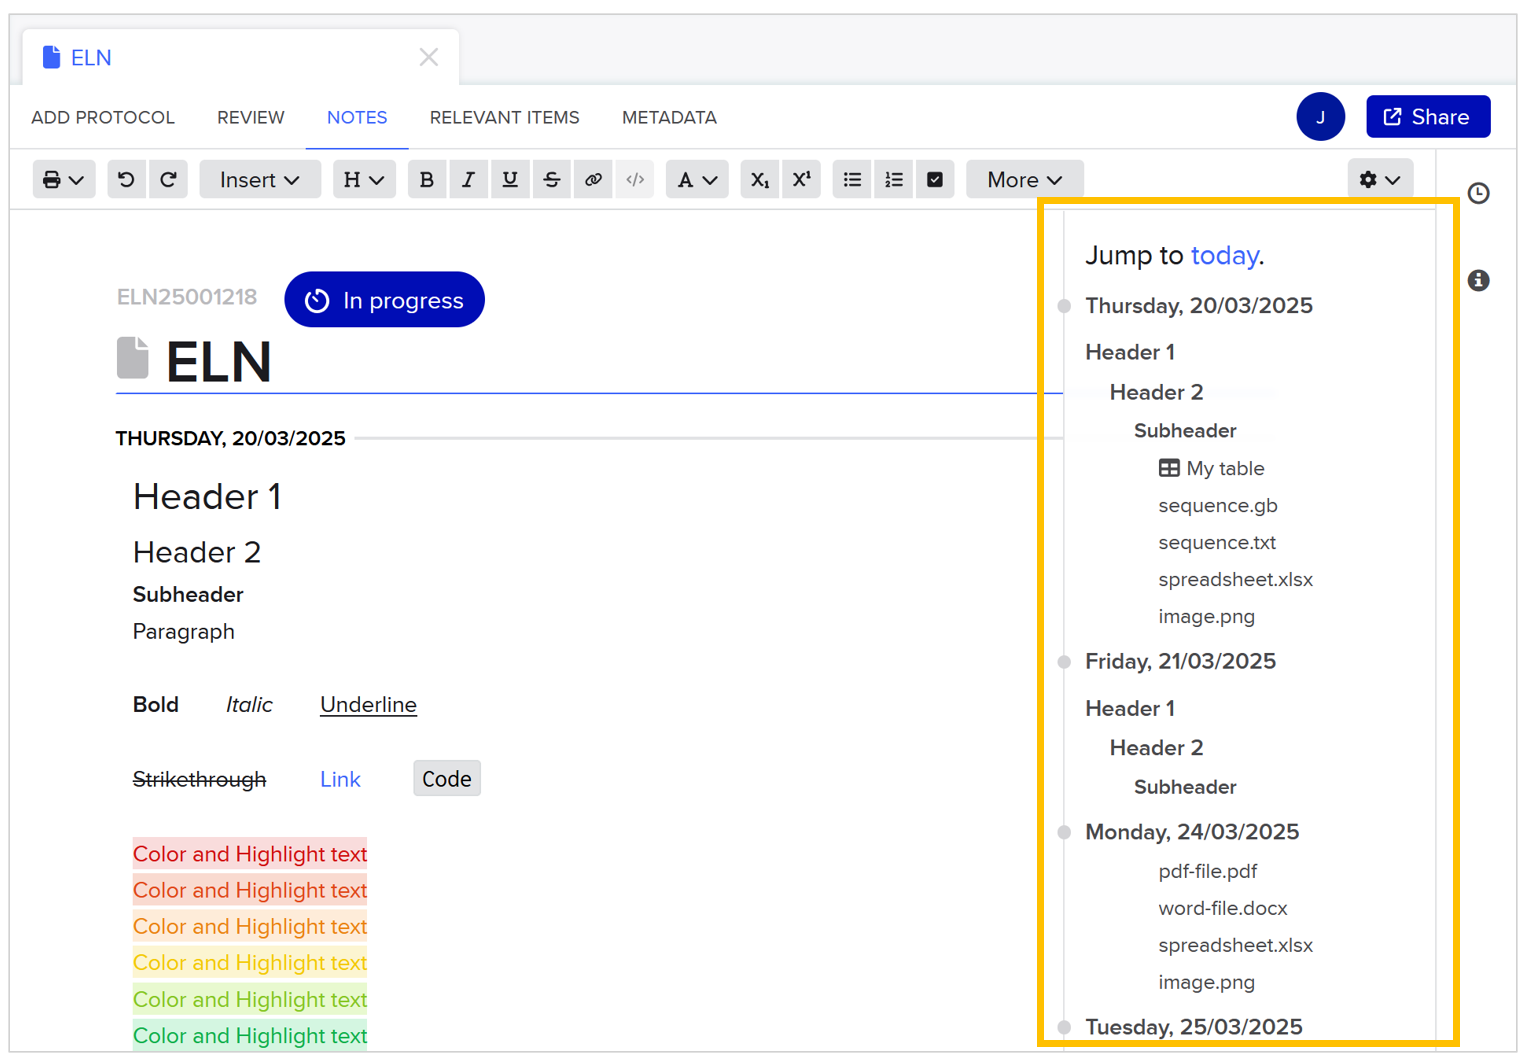
➡️ Navigate entry with the table of contents
Benchling automatically generates a dynamic table of contents to help you navigate the elements in your ELN, which is particularly useful for lengthy and complex notes. The order in which the table of contents is organized is: section, headers, tables and attachements.
Other resources:
Try out ELN functionalities by creating entry from template “The basics” stored in LIMS SUPPORT template collection.
If you have any question, don’t hesitate to contact us at lims_support@bright.dtu.dk.