How to export research data and continue working on Benchling
If you are a guest researcher at BRIGHT, staying for a limited amount of time, you may still want to work on Benchling after your stay is over.
🎯 This guide explains the available options and limitations related to data export and setting up a free Benchling account.
How to export your data
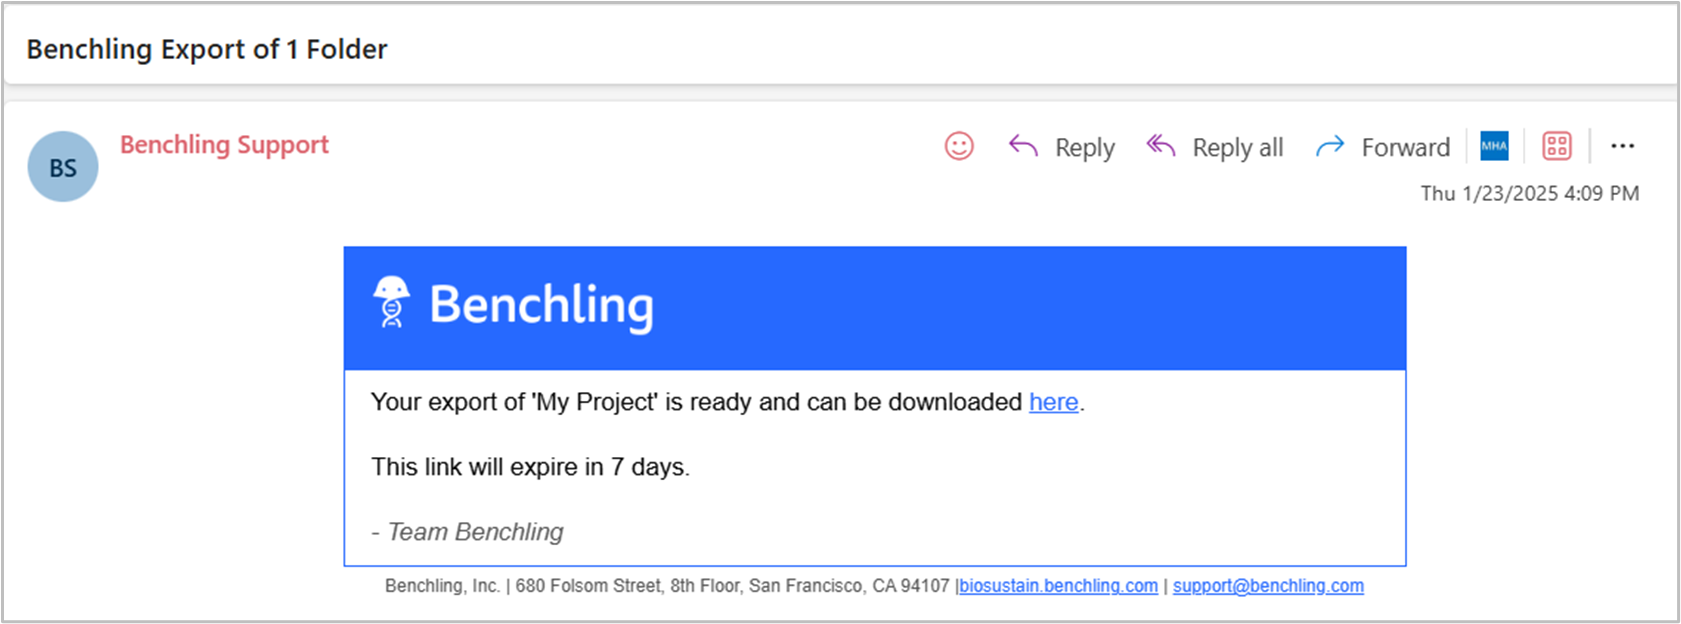
You should export the data of your project before losing access to your DTU domain account. To do so, go to your project or to the project with your data and find the “Export” option, as shown in the image. You can download all your data as a ZIP archive.

Note
You can export data from multiple locations (folders) at the same time.
Caution
By default, the export will include all archived files. If you don’t need them, make sure to de-select all “Archive Reasons” before clicking “Export”.
You will receive an email with a link to download the file. Depending on the size of your files, the email may take longer to arrive.
Specific exports
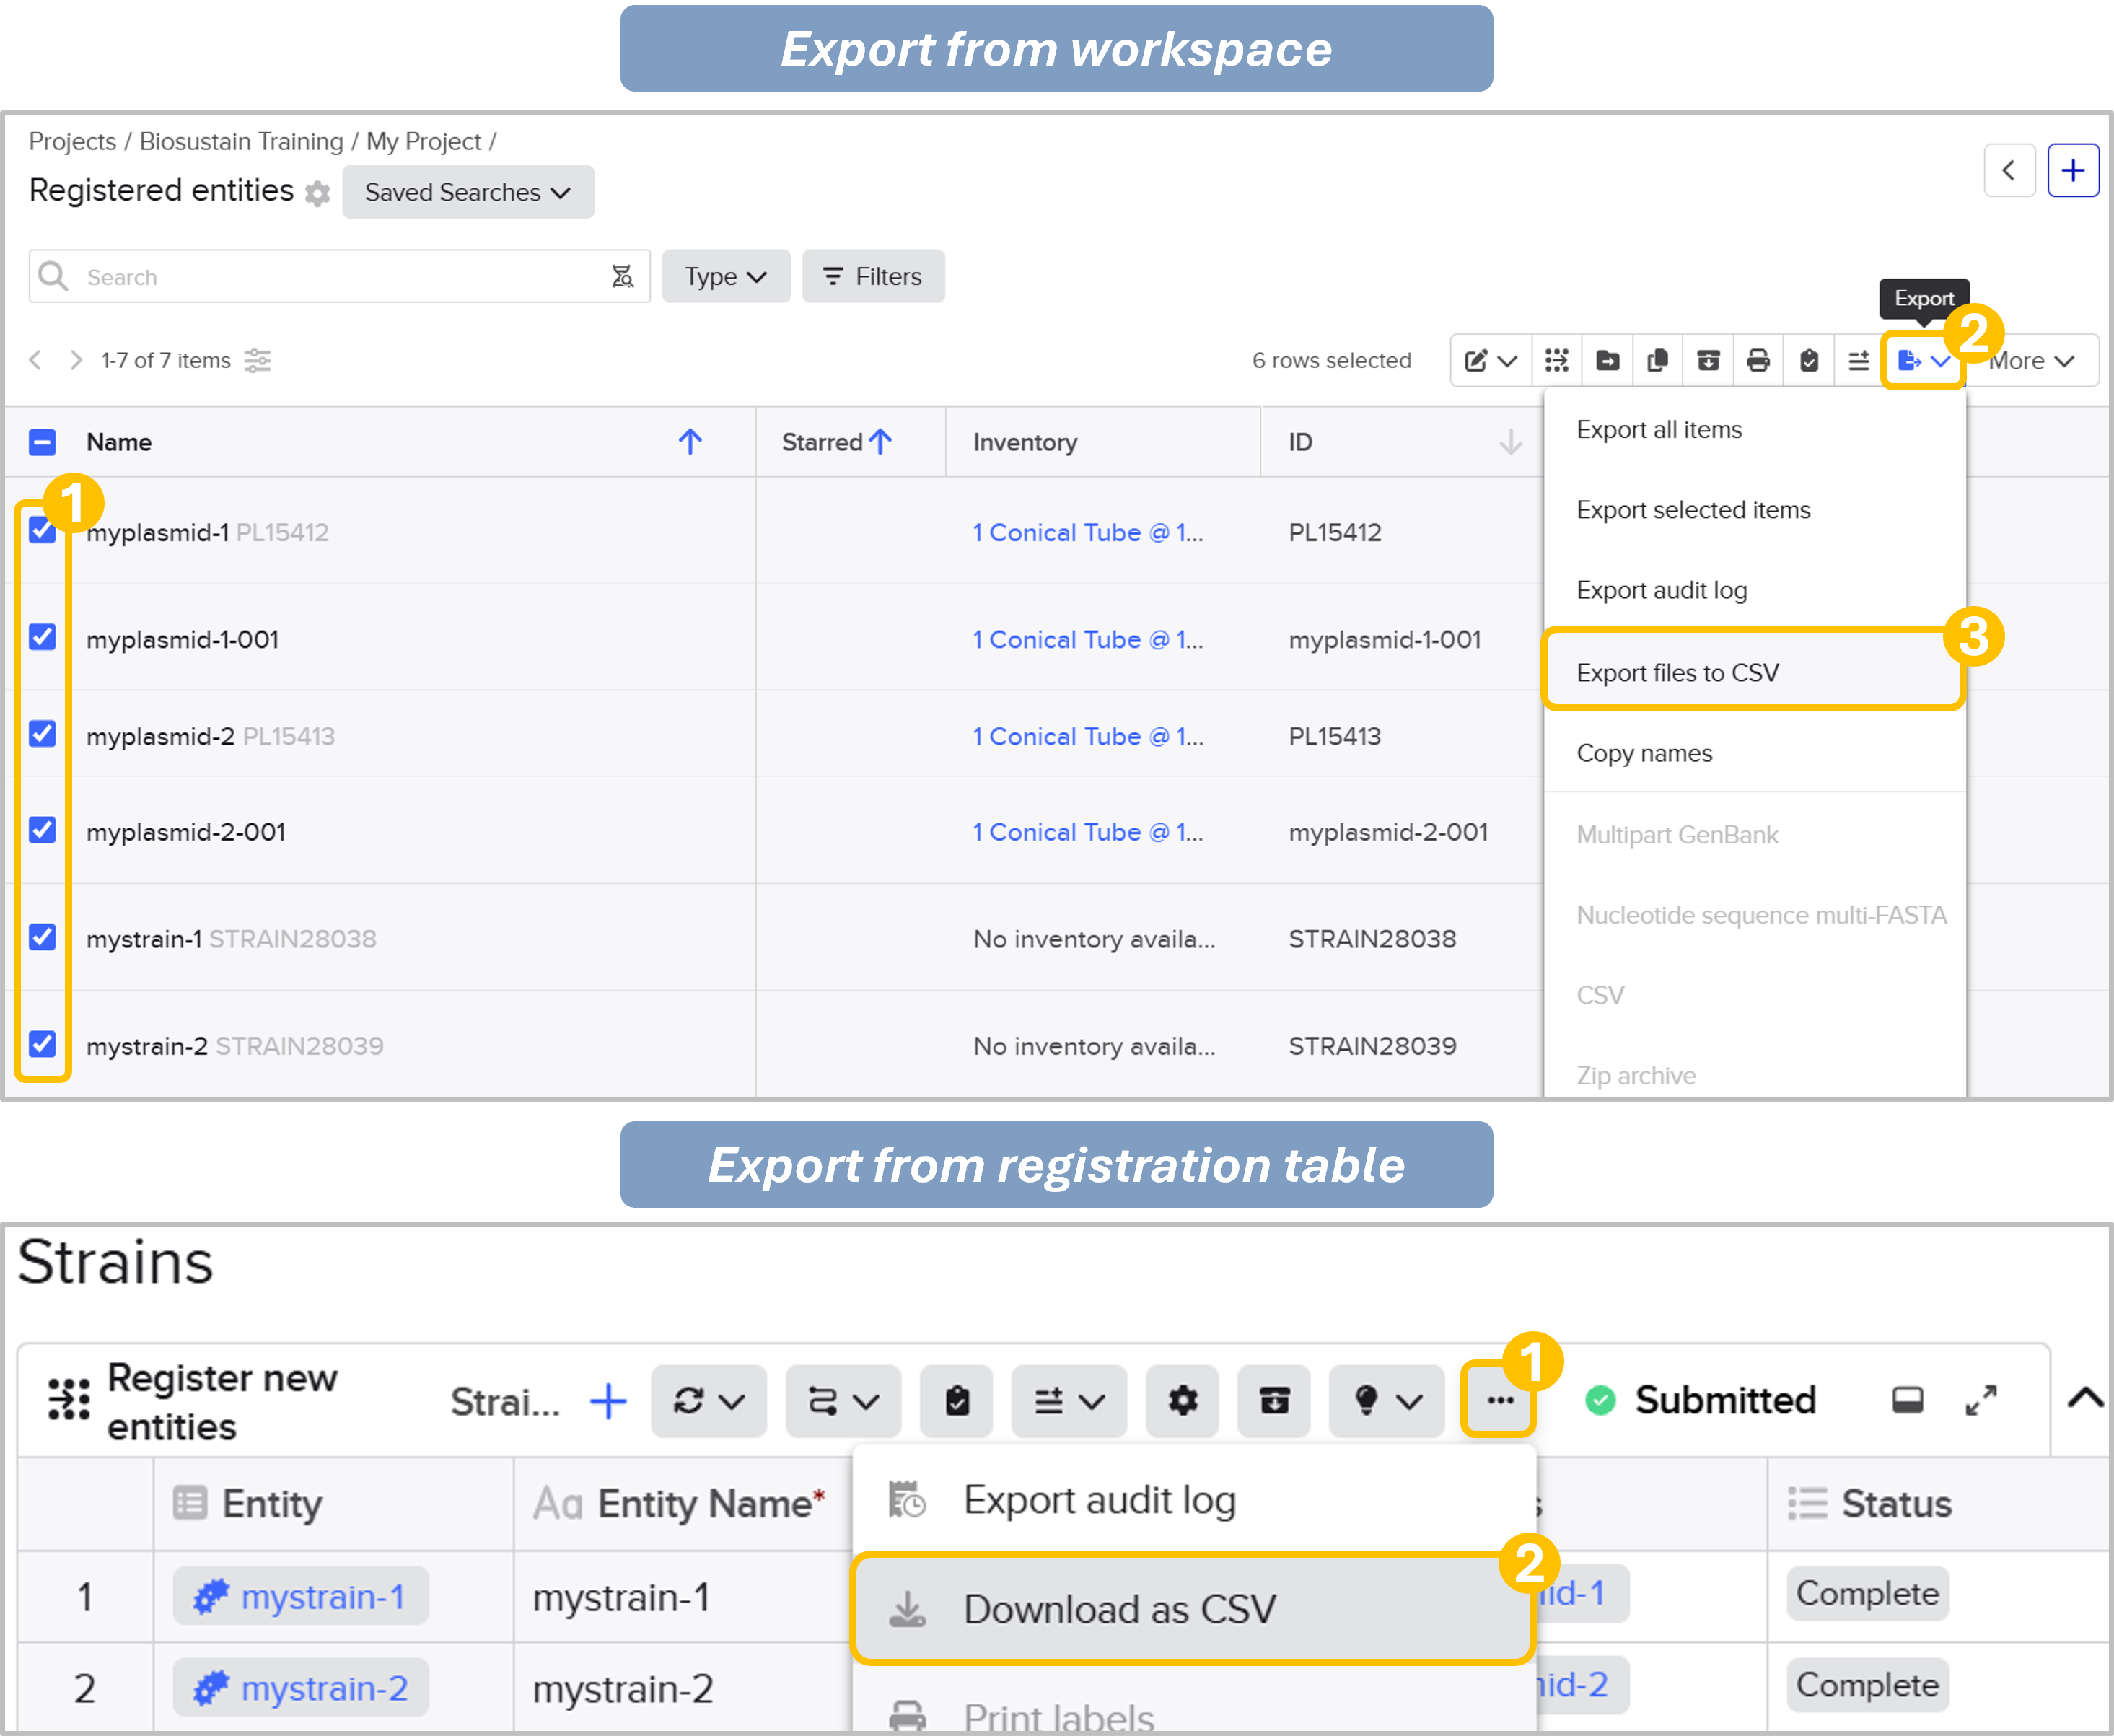
Registered entities and inventory information
The “Export” options shown above generate individual files for each registered entity, and the option to obtain a spreadsheet leads to all entities of a given schema in the BRIGHT Registry being included.
To obtain a spreadsheet of specific entities, you can either select them from the expanded workspace view or from registration tables in your Notebook entry, as shown below.
Note: The first option lets you download entities from different schemas at the same time, generating a single spreadsheet that combines all schema fields as columns. To avoid this, you can filter by schema before selecting the entities to export.
You can follow similar steps to export information related to containers in the Inventory. For further information, refer to this guide.
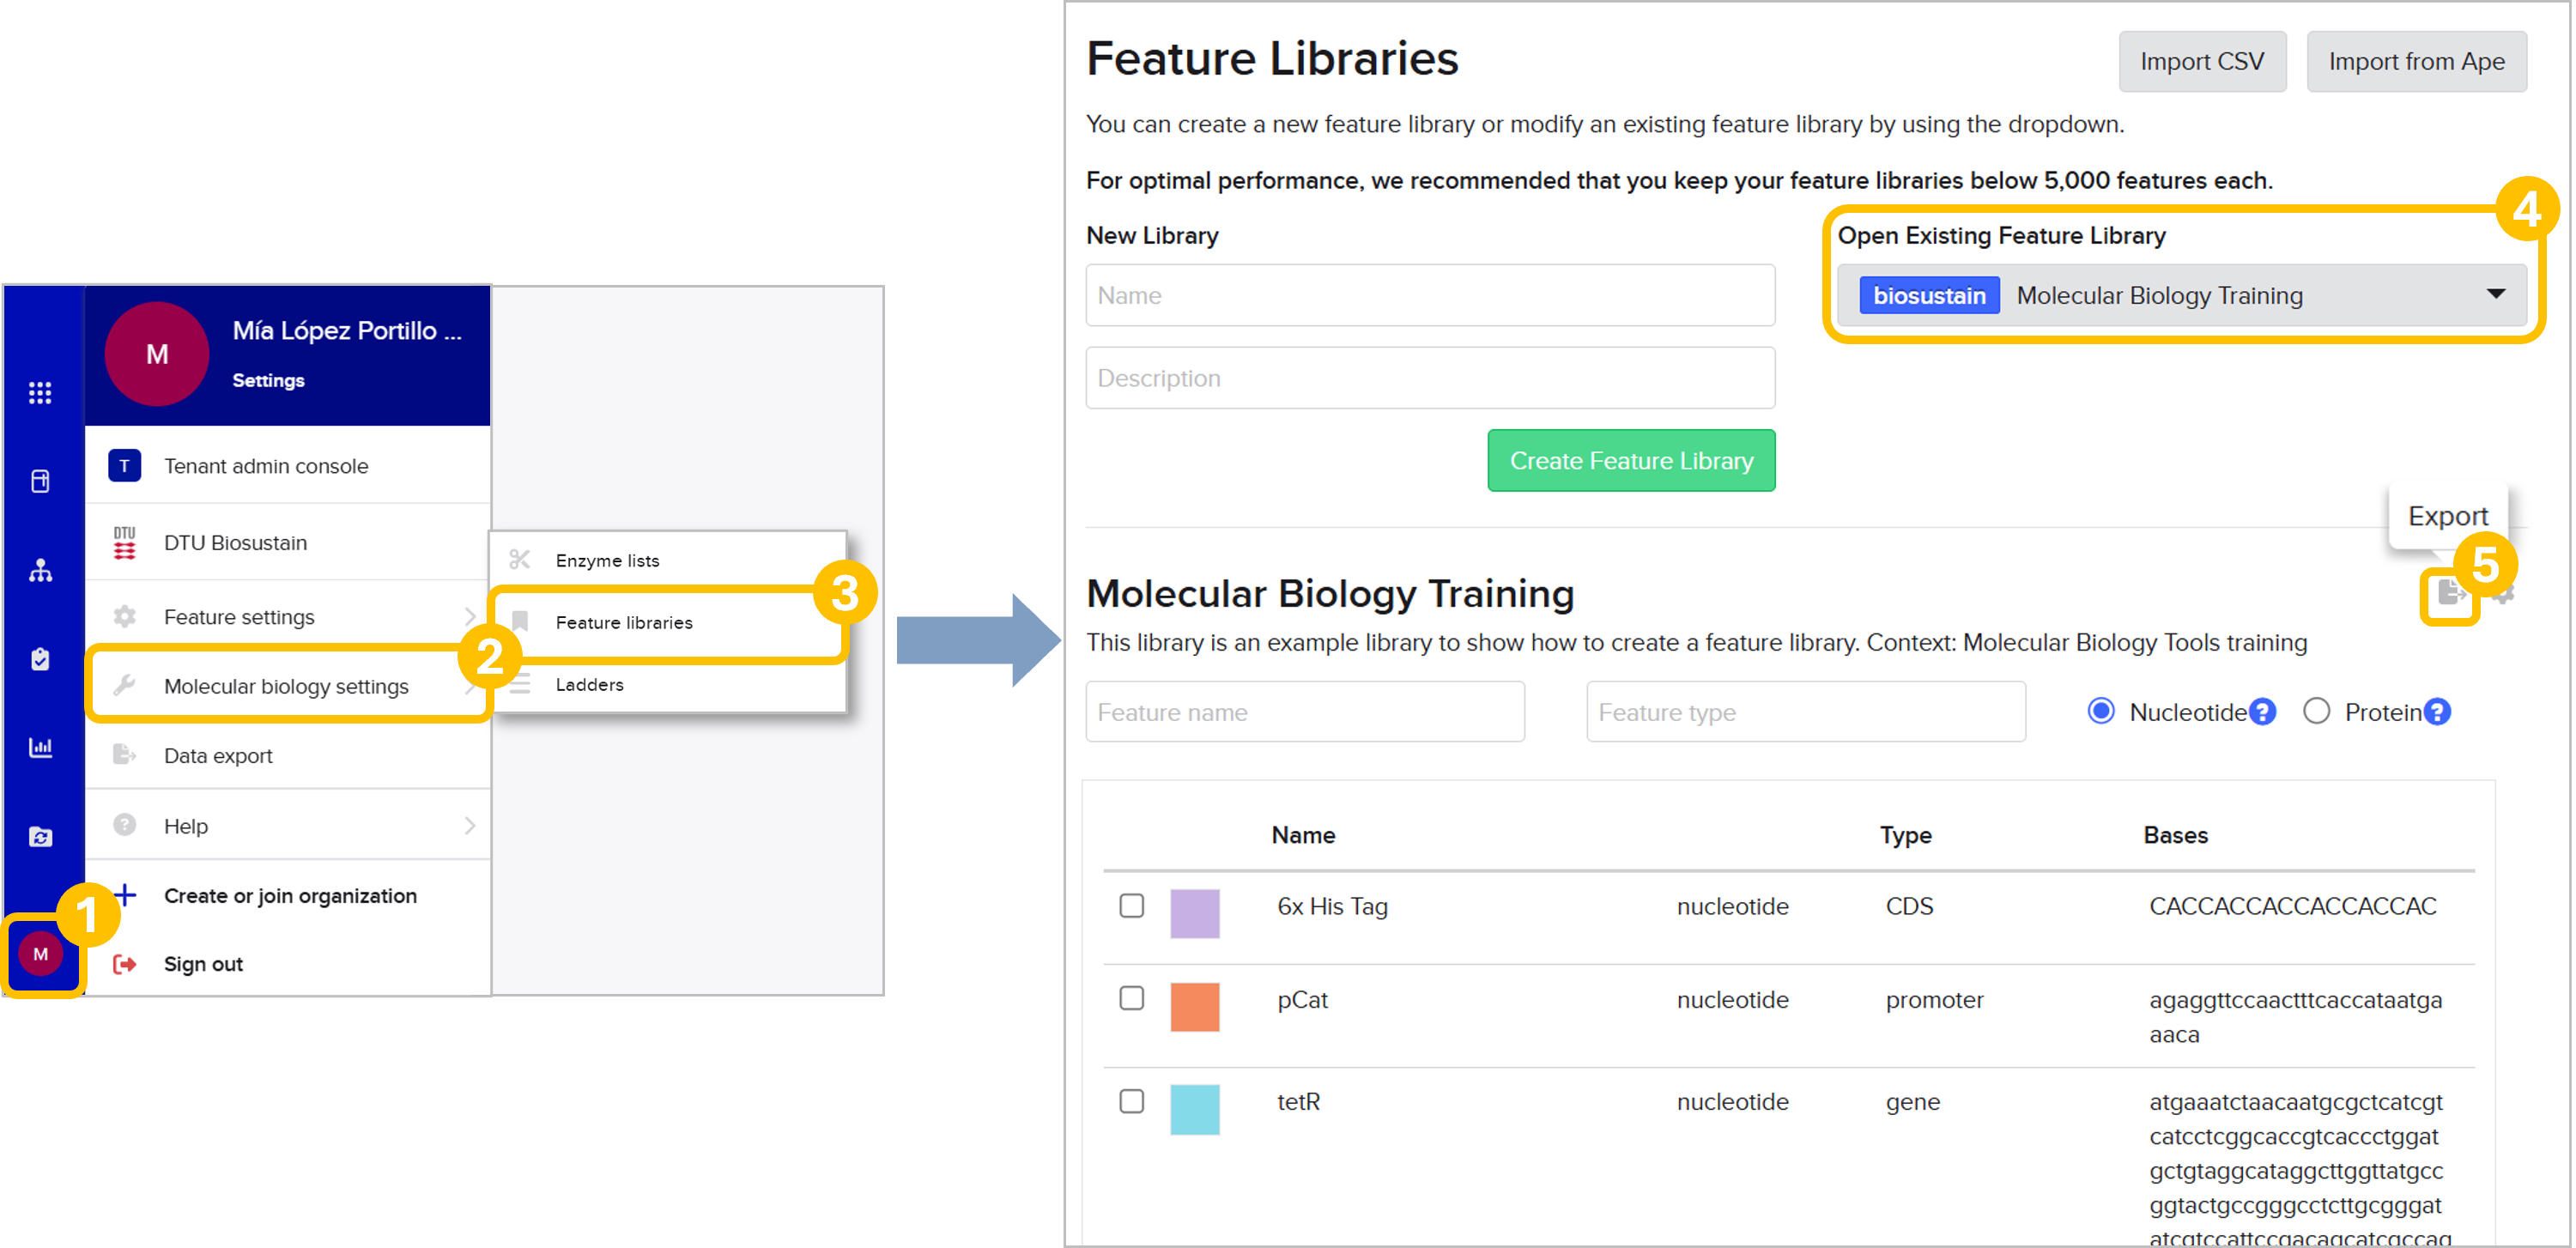
Feature libraries
If you want to keep using your lab’s or other personal Feature libraries to auto-annotate your sequences, you can export them as .csv files which you can then import into your personal account.
Alignments
Alignments done for DNA sequences are not automatically exported. If you have important alignments you’d wish to refer back to, make sure to export them by following this guide.
Modifications to files
The exporting process may generate some additional files to those in your original project folder. As shown in the picture below, there may be up to three files in different format in your downloaded folder per Benchling entity. The GenBank files will likely be the most useful for you.
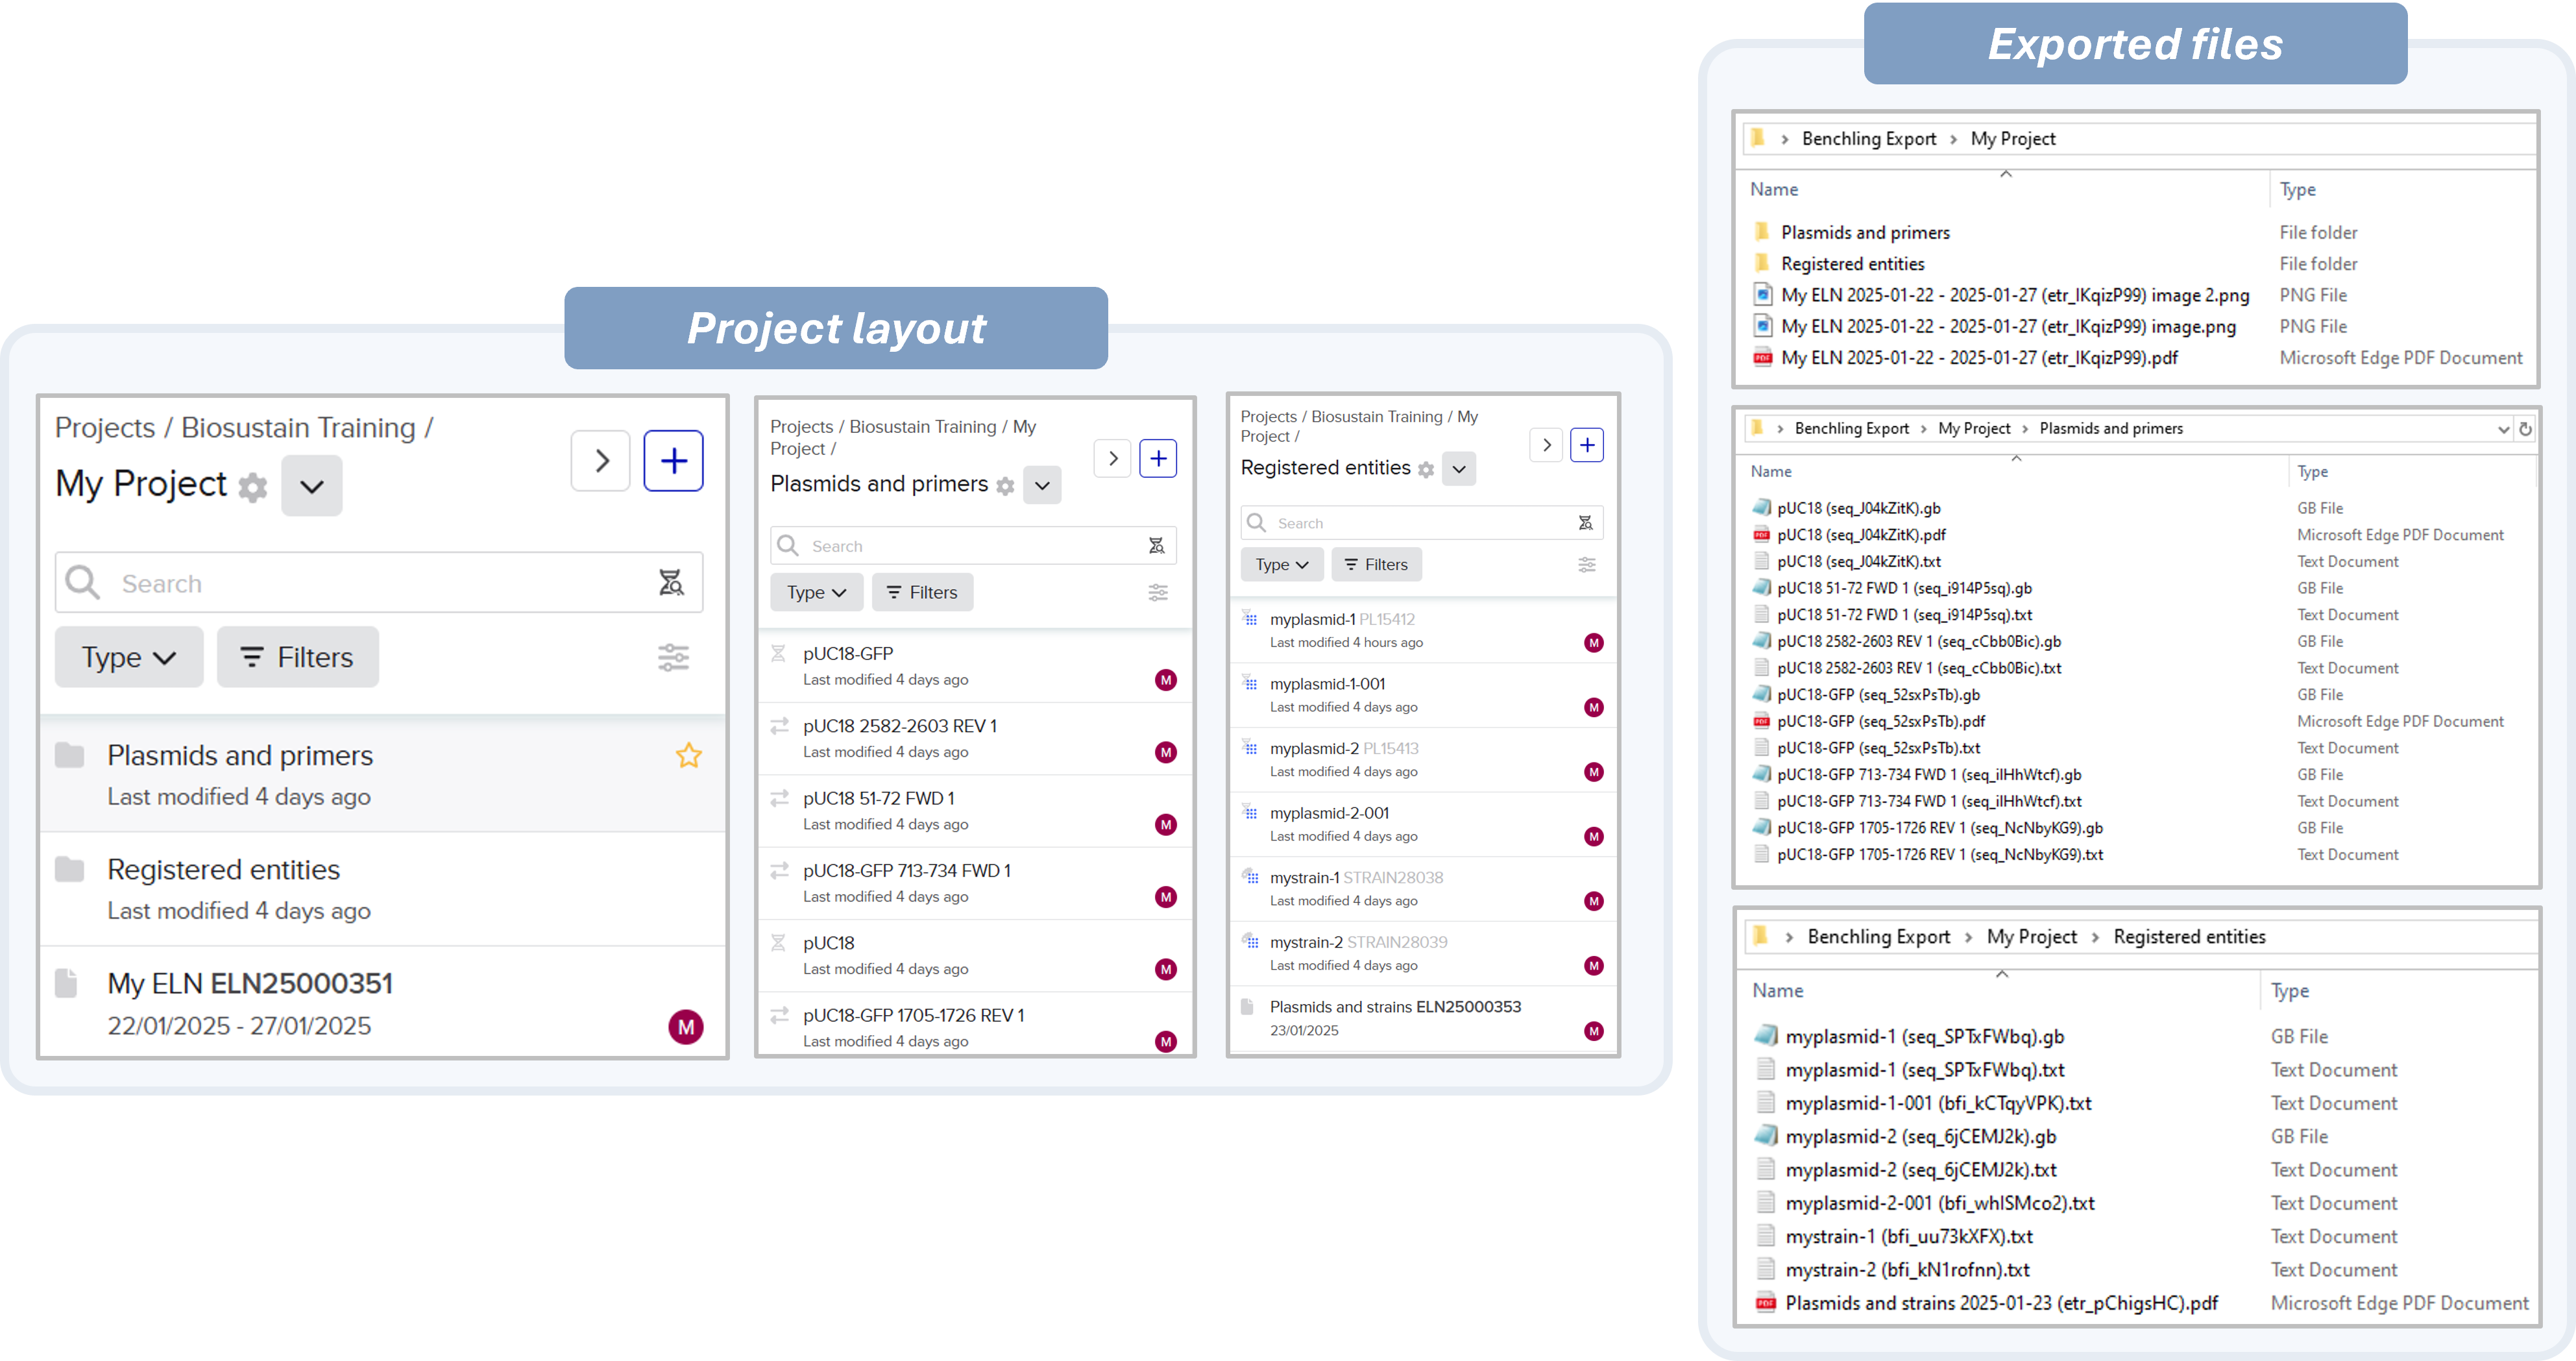
Results when exporting All items and choosing PDF format.
DNA sequences
They are exported in GenBank (.gb) format, and metadata related to the schema of the file (eg. plasmid, primer, gene) is stored both in a Text file (.txt) and in the “Keywords” field of the .gb file.
Primers attached to a sequence are formatted as annotations when exported, with the sequence included in the note, as shown in the video below.
Notebook entries
These can be exported as HTML or PDF files. If there are links, they will remain functional, but may lead back to the BRIGHT tenant (for example, if you link to a particular plasmid).
Files attached to your entries will be mentioned or shown in the HTML/PDF file and also provided as separate files.
Registered entities
As mentioned in the previous section, the “Export” option for an entire folder generates individual .txt files for each entity, which list off all fields that correspond to their schema. Schemas that have an associated DNA file to them also generate a .gb file, which includes both the sequence and the schema fields in the “Keywords” field.
Setting up a personal Benchling account
Create a free personal account.
Go to Benchling’s academic website (not the BRIGHT tenant) and click on “Sign Up”. Create an account with a personal email or with a Google account.
Caution
You should not create your personal account with your DTU email, which will be deactivated once you leave BRIGHT. Make sure to use an email address you will not lose access to.
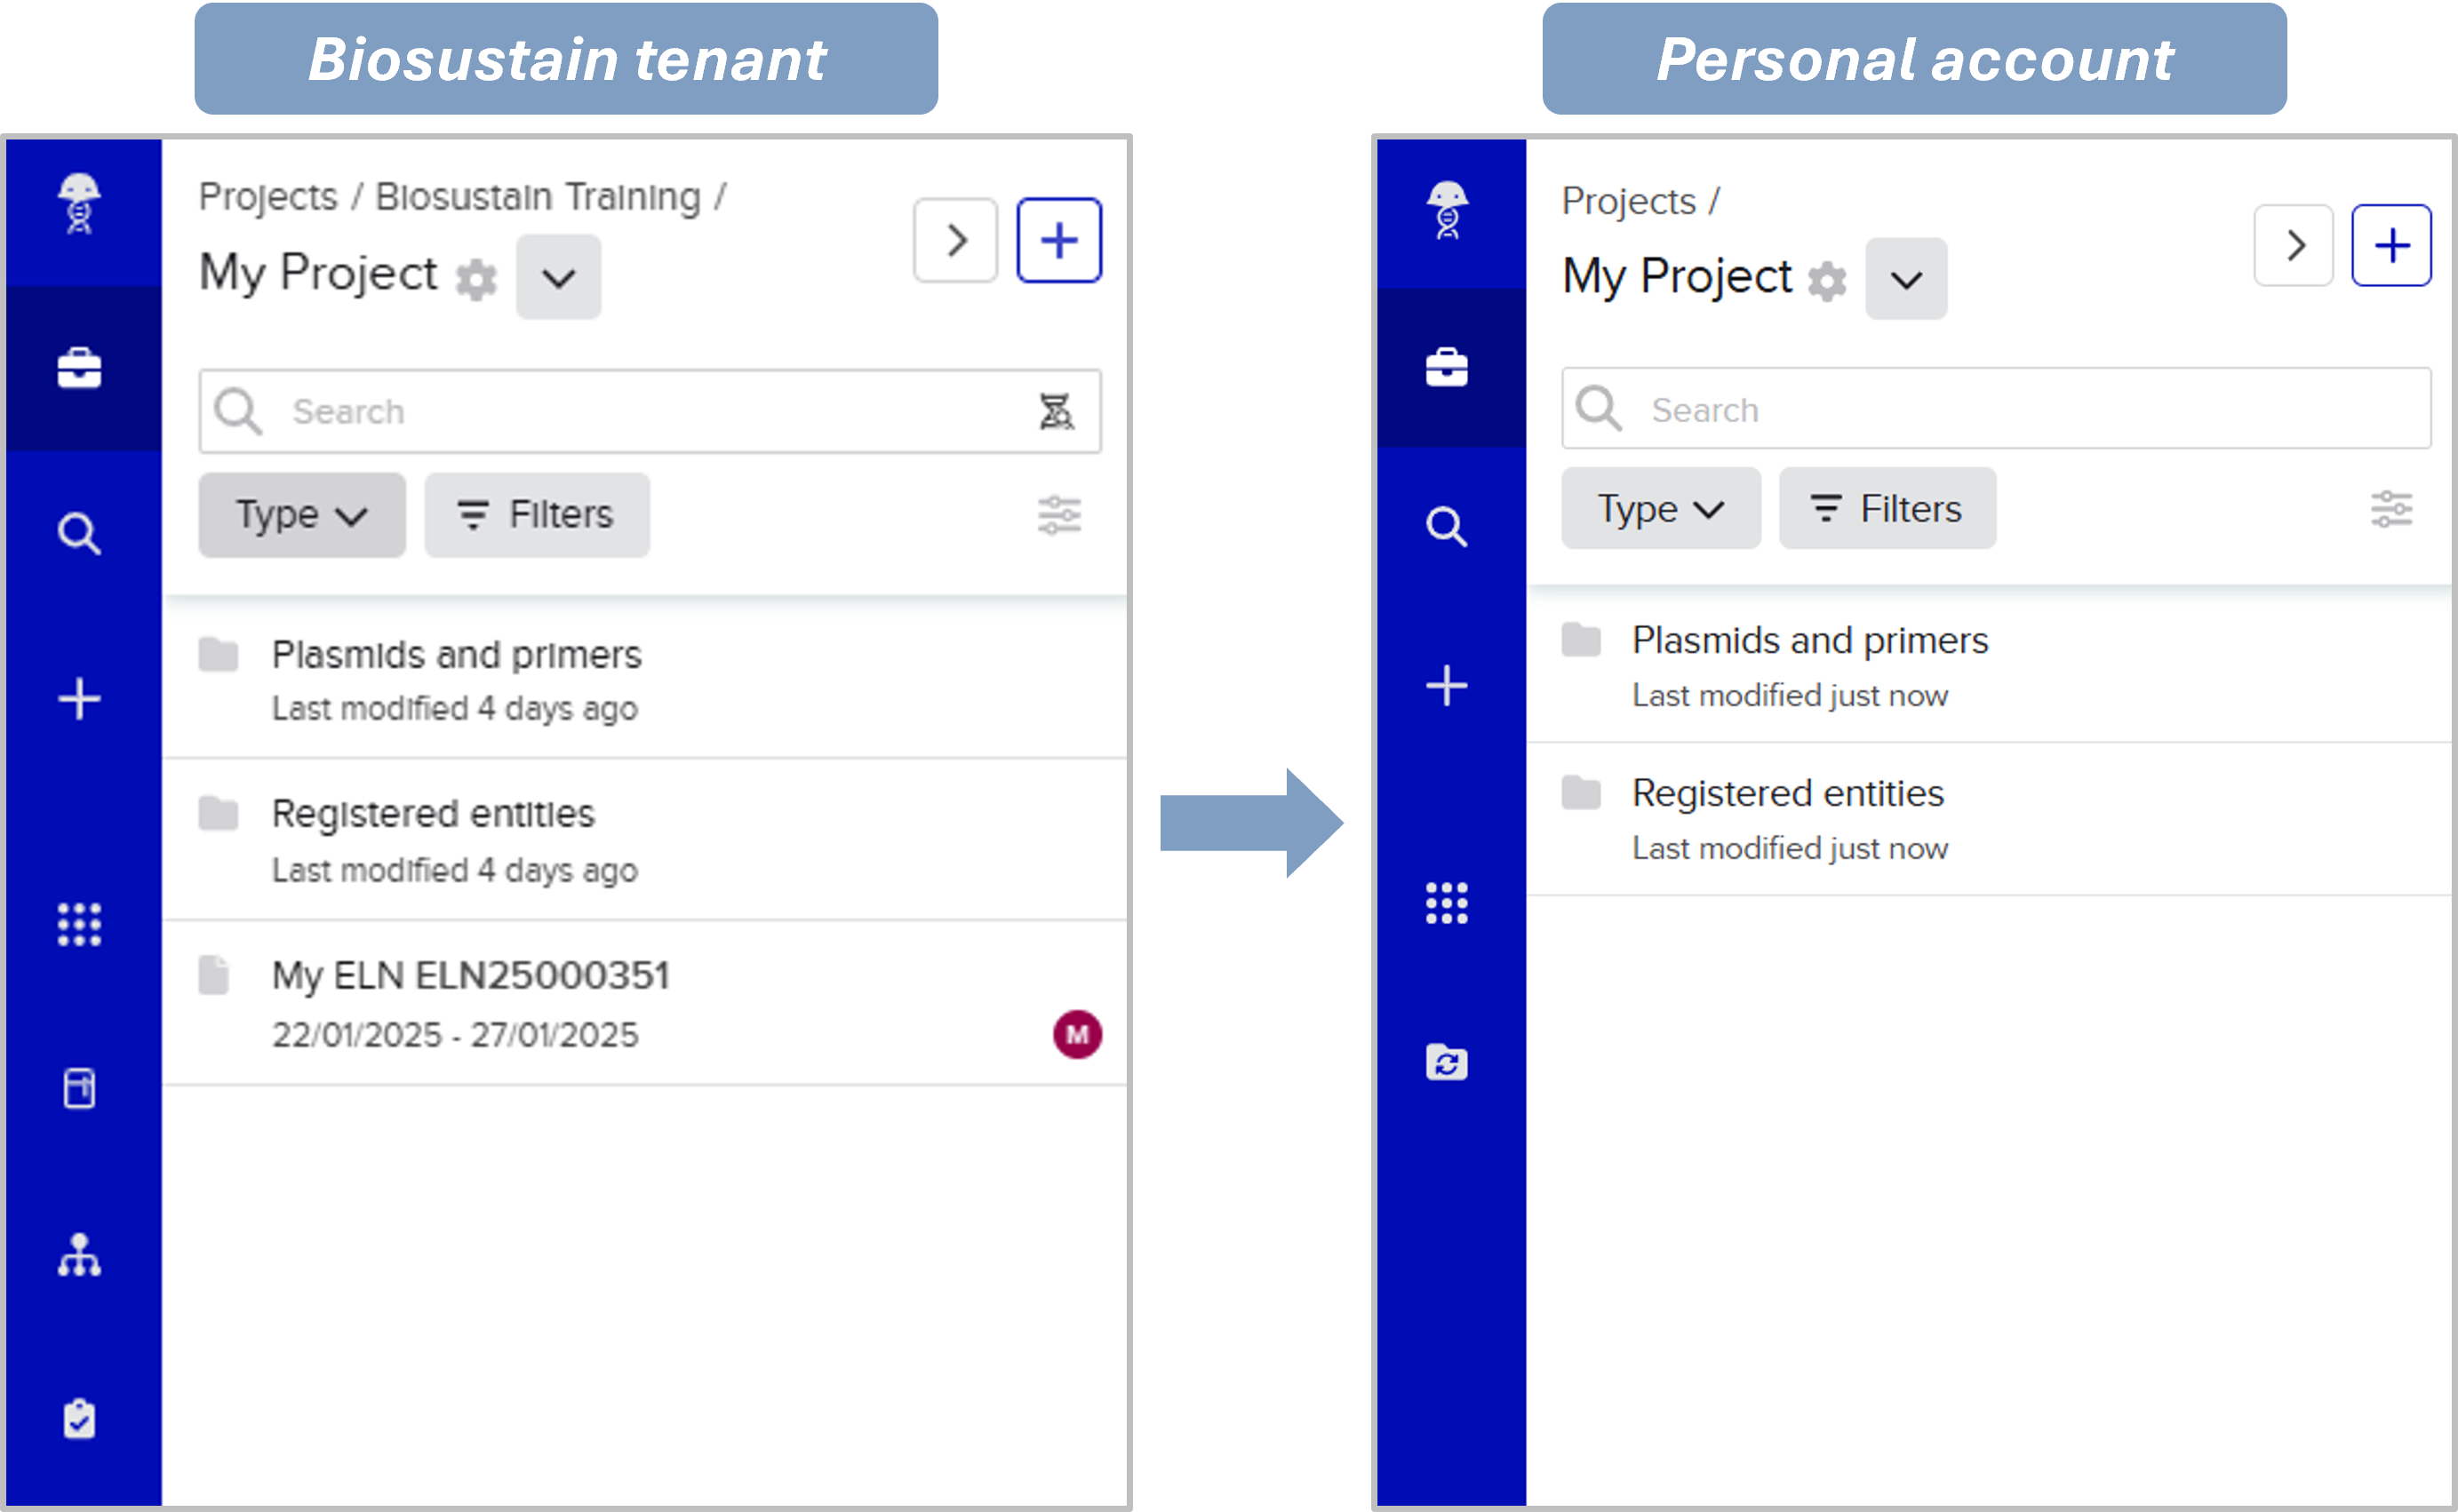
Create your folder/data structure. In your personal account, create a project folder along with its corresponding subfolders.
Upload your data Follow the recommendations from the previous sections, along with the table below, to upload relevant files onto your personal tenant.
Importing files onto your personal account
Data type |
Import option |
|---|---|
DNA sequence |
Upload GenBank files |
Notebook |
Attach PDF files to new Notebook entries |
Registry and inventory |
Your personal account will not have access to the registry, therefore, there will be no schemas nor inventory options. You can keep this information as external spreadsheets or attach it to Notebook entries. |
Note
Once you’re done with these steps, you will be able to continue using the free version of Benchling to keep track of your experiments and to take advantage of its Molecular Biology suite.
If you have any question, don’t hesitate to contact us at lims_support@bright.dtu.dk.